Saturday, 18 February 2017

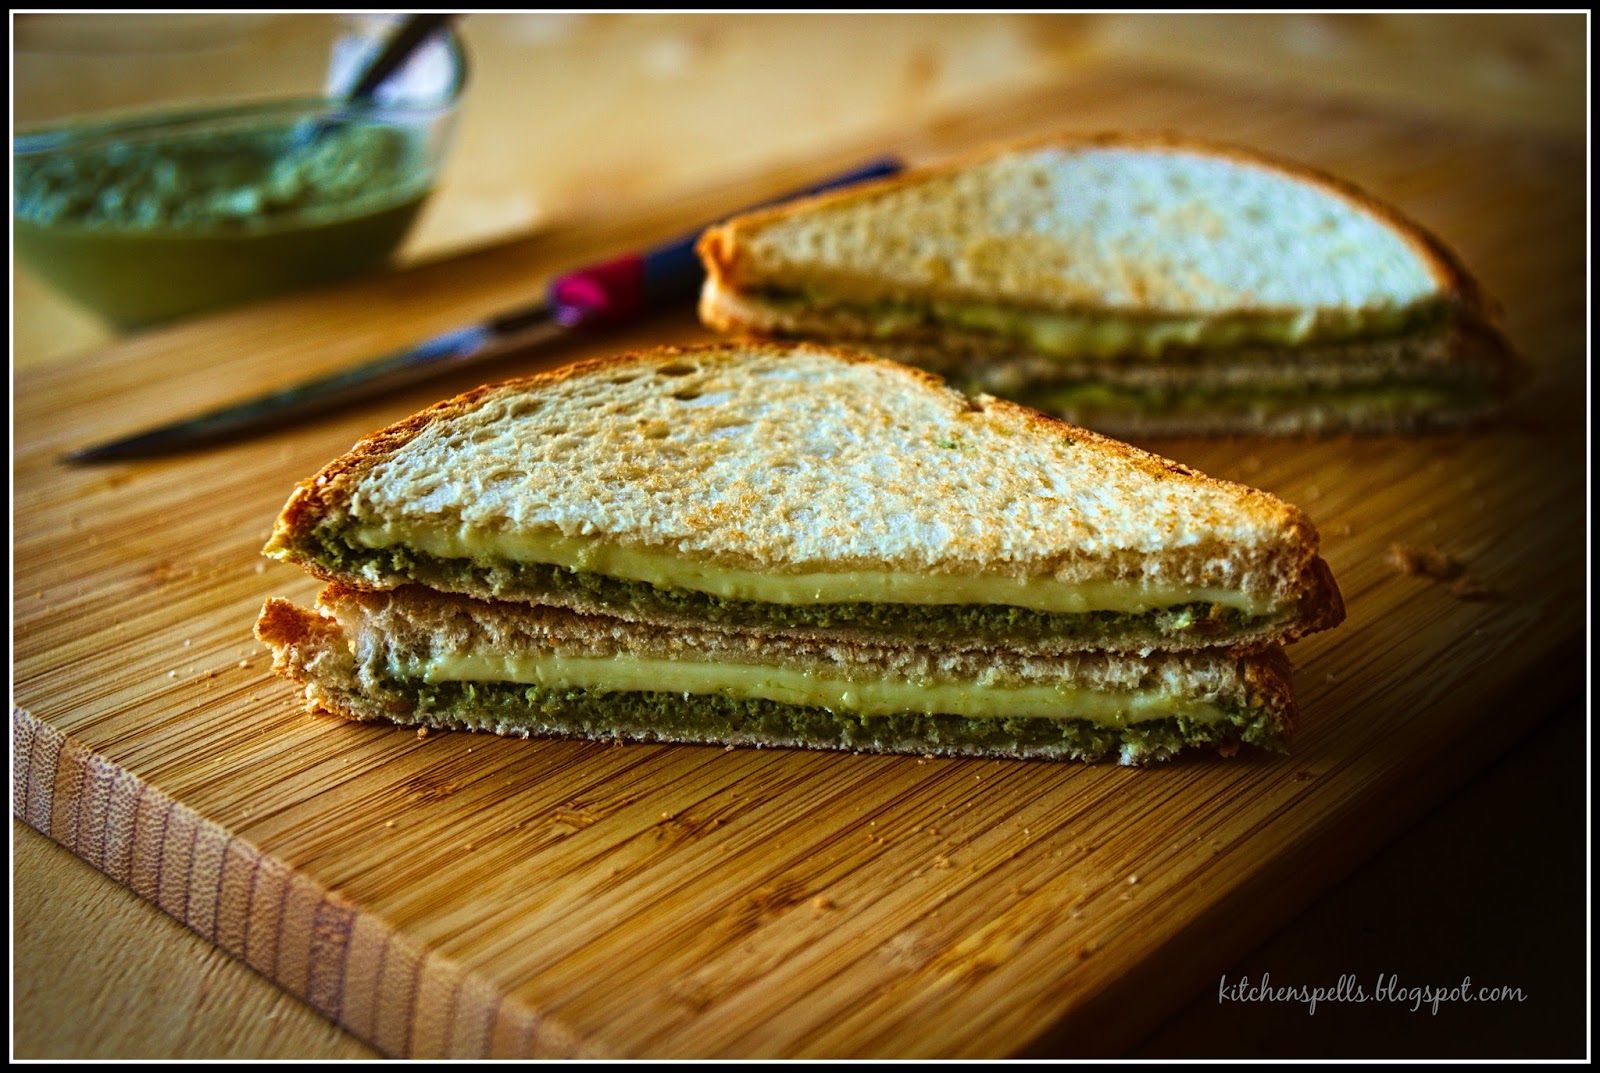
Chutney Cheese Sandwich

Every vacation has three phases - 

  • The waiting phase - You have planned your vacation, arrangements have been made, you are on a shopping spree, you are texting your relatives and friends on your upcoming vacation plans, you are clearing your fridge and finally packing your bags. To add on - I do an additional cleaning of the house because I love to see the house clean and neat on my return! This is an exciting phase and the feeling that you have something bright to look forward to makes even the most daunting task enjoyable.
  • The actual vacation - this is the fun part. Your waiting is over and here it is finally - the execution of all that you planned. Meeting family, friends and relatives - lots of nostalgic moments, being pampered by family until the day it is time to pack your bags and return.
  • The vacation hangover - the most annoying phase that comes after your vacation. The feeling of emptiness, a vague sense of nothing to look forward to, a weariness to get back to track, a derisive resolution to lose the holiday weight , yada - yada! Here even the most simple task seems a truckload.
It is phase three for me now - vacation hangover mode. While I was happy to enter into a clean and neat house - the happiness did not last long. I am bemused on how a house closed for 2 weeks can gather so much of dust!!

It has been 24 hours since my return to Dubai and I have only entered kitchen to make a coffee for myself this morning! I have 2 unpacked suitcases in front of me as I write this ( removed only the food items to be refrigerated - can't lose that, Can I ?), a dirty balcony to clean up, nothing to eat for lunch except thoughts on what I should cook and a whole lot of laziness that stops me from getting up from this couch and doing something!

So while I figure out how to get over the vacation hangover phase - Why don't you guys take a look at the new recipe made and clicked during the waiting phase while clearing the refrigerator!!

kitchenspells.blogspot.com


Ingredients

(makes 4 sandwiches)
  1. Mint Leaves/ Pudina - a fistful
  2. Coconut - 1/2 cup freshly grated
  3. Ginger - 1/2 tsp chopped
  4. Salt to taste
  5. White Bread/ Sandwich bread - 8 slices
  6. Cheese slices - 4
Method
  • Pulse together the mint leaves, coconut and ginger along with salt. Add 2-3 tablespoon of water to attain the consistency required for easily spreading it on the bread slice.
  • Slather about a tablespoon of chutney on the bread and top it with the cheese. Seal it off by placing another bread slice on top.
  • Toast the sandwich on your tawa or a sandwich maker. Serve this hot!
kitchenspells.blogspot.com

Check out other sandwich recipe on the blog.

Saturday, 11 February 2017

Masala Chai / Masala Tea || Cooking with Family and Friends - #2 ||

kitchenspells.blogspot.com


Living in the middle east makes you crave for those green sights and where better can you satisfy your longing than at your parents place. Sitting back and relaxing with a steaming pot of masala tea on the traditional cane chair overlooking the yard - watching the orchids and the roses bloom in mamma's garden, three naughty little dachshunds (Rani - the senior and our companion for years, Bruno - the naughtiest and gunda of the lot and the 7 month old sweetheart, Coco)dashing around like there is no tomorrow  and a wonderful evening pass by with your family.  There is truly no place like home!! Can't say how much I miss this. I crave for those rainy weekend evenings during the school days when all we needed was a cup of tea with fried snacks and lots of family talk!

This time in our series of cooking with family - it is my mamma again as we make masala tea for one such wonderful and lazy evening when all we want to do is sit and chat!

kitchenspells.blogspot.com


Ingredients
(Makes 4 cups)

  1. Water - 2 and 1/2  cups
  2. Milk - 2 cups
  3. Ginger - 1 inch crushed
  4. Star anise - 1
  5. Cinnamon - 1 inch
  6. Cardamom - 3 crushed
  7. Cloves - 4
  8. Tea Leaves -  2 tbsp
  9. Sugar
Method
  • Add water to a pan along with ginger, star anise, cinnamon, cardamom and cloves. Bring this to boil and let it simmer for 5 to 10 minutes.
  • Add the tea leaves and turn off the flame. Keep it covered for 5 minutes.
  • Switch on the flame and add the milk. Bring this to boil and turn off the flame.
  • Strain the tea and add sugar as per taste. Serve it hot with your evening snacks!
kitchenspells.blogspot.com


Monday, 6 February 2017

Vermicelli Upma/ Semiya Upma


It is vacation time and for the first time blogging from a place other than home in Dubai. It feels good to be home and lot of changes have happened in a year - our family of doggies grew from 2 to 3, trees have been replaced by roads and places are beyond recognition, the bakery with my favorite egg samosa seems to have closed down, swipe machines have appeared even at the smallest of stores - demonetisation effect and yet the Gudbud ice cream tastes heavenly except for the increasing price and the decreasing glass size!!

While I feast on my mom's food and savor every moment - why don't you guys virtually feast on the recipe from my archives - Vermicelli Upma. I love the sweetness of this and for me it goes well even without a chutney. Ghee enhances the flavor and peanuts adds the crunch. So here we go - 


kitchenspells.blogspot.com


Ingredients

(Serves - 2)
  1. Vermicelli - 1 cup
  2. Water - 1 cup
  3. Mustard seeds - 1/2 tsp
  4. Urad dal - 1 tsp
  5. Chana dal - 1 tsp
  6. Curry leaf - 1 sprig
  7. Onion - 1 small chopped
  8. Green Chilly - 1
  9. Ginger - 1/4 tsp chopped
  10. Carrot - 4 tbsp chopped
  11. Peanuts - 2 tbsp
  12. Cashewnut - 1 tbsp
  13. Raisins - 1 tbsp
  14. Sugar - 1 tbsp heaped
  15. Salt
  16. Ghee
Method
  • Heat a skillet and add 2 tbsp of ghee. Fry the peanuts, cashew nuts and raisins separately and set aside on kitchen towel to drain excess ghee.
  • In the same skillet, add the mustard seeds and let it splutter.
  • Add the urad dal and chana dal. Once this browns add the curry leaf as well.
  • Now, add the chopped onion along with the ginger and green chilly and cook until the onions are done.
  • Add the chopped carrots along with the vermicelli and cook it for about a minute and half before adding water.
  • Adjust salt at this stage and a tablespoon of sugar for the sweetness.
  • Cook until done. Add the nuts and raisins at this stage and give it a good mix.
  • Serve along with coconut chutney.
kitchenspells.blogspot.com


You may also note
  • Cooking time of vermicelli depends largely on the type that you buy. I used the thin one which got cooked quite fast uncovered.
  • You may use coriander leaf for the final garnish.

Saturday, 28 January 2017

Coriander Chutney

There is nothing like a hearty breakfast!

I would not say that breakfast is the best meal of the day for me - I am always partial towards dinner. Yet having a good breakfast keeps you going for most part of the day.  As a part of my first job in India, we were part of the HR panel for Campus recruitment of freshers. This demanded of us to travel to different cities and were often put up in hotels approved by the company. No compromise on safety and security! Goes without saying that we had the luxury of staying in a couple of prominent 5 star hotels - royal bedrooms and hearty meals. Breakfast is complementary in these hotels and we would definitely not miss that! It was always a combo of Indian and English - from idli, vada, sambar to the croissants, muffins and sausages - name it and you had it there.  So even now when I hear of breakfast buffets I jump at the idea. The widespread buffet is such a visual treat and leaves you with a happy tummy.

So over to my recipe today. Since I have talked about breakfast - my recipe also has got something to do with breakfast. Coriander chutney is our bowl of happiness with idli or dosa. Do try it and enjoy!


kitchenspells.blogspot.com

Ingredients

  1. Coconut - 1 cup grated
  2. Coriander leaves - 1/2 cup chopped including stems
  3. Green Chilly - 1 or 2 depending on the spice quotient
  4. Ginger - 1 tsp chopped
  5. Salt to taste
  6. Water - 1/2 cup
  7. Mustard seeds - 1/4 tsp
  8. Urad dal - 1/4 tsp
  9. Oil
Method
  • Pulse together the coconut, coriander leaves, green chilly, ginger and salt. Add the water to attain the desired consistency.
  • Heat oil in a pan and add the mustard seeds and let it splutter. Add urad dal and once the color begins to change lightly add the chutney. Add more water if required and switch off the flame when it heats up. Do not let it boil.
  • A great breakfast companion with idli, dosa or vada.
kitchenspells.blogspot.com

You may also note - 
  • You could also add curry leaves and red chilies for tempering
  • The fresher the coriander and grated coconut the better the flavor

Monday, 23 January 2017

Caribbean Plantain Fritters

Sue's Kitchen in Bangalore is a popular Caribbean restaurant. It was for a team lunch that I stepped in there for the first time in December couple of years back. It was a small yet cozy place and I fell in love with the food. I was intrigued by the similarity of the Caribbean food to the Kerala cuisines. The buffet spread was decent and the variety amazed me. I was particularly fond of the pan fried plantains. It is something that we often make at home - yet I simply could not resist going back for more.

So on those lazy days when I sit back and wonder what to do with time in hand - I have flashbacks of some wonderful moments and Sue's Kitchen happened to be one of them. I had plantains and I wanted it to be Caribbean. So off I set on a internet search and came up with the fritters recipe. The basic difference I have incorporated is steaming of the plantains and cooking on tawa without deep frying it.  It is definitely a hassle free recipe and would make a good snack time recipe. So here we are - 


kitchenspells.blogspot.com

Ingredients
( Serves - 4)
  1. Plantain - 2 ripe
  2. All purpose flour - 1/2 cup
  3. Milk - 1/4 cup
  4. Nutmeg powder - 1/8 tsp
  5. Cinnamon powder - 1/4 tsp
  6. Sugar - 1 tsp 
  7. Salt to taste
  8. Ghee
Method
  • Steam the plantains skin on until soft and let it cool.
  • Remove the skin and mash it using a fork adding 1 tbsp of sugar into it.
  • Sieve the flour, salt, nutmeg powder, cinnamon powder and set aside.
  • Now add the milk and give it a good whisk 
  • Slowly add the dry ingredients in batches until well combined. The batter would be thicker than the pancake batter.
  • Heat a tawa and grease it with ghee ( oil also will do, personally I feel that ghee goes along perfectly well with plantains.) Ensure that the flame is on low throughout the cooking.
  • Wet your hands and scoop out a lemon sized ball. Place it on the tawa and press it with your hands to get into a round shape. Alternatively scoop using a laddle and press it down onto the tawa. The second method gave me inconsistent shapes and hence I began using hands for the process. Give it about a minute to cook on one side and flip it over.
  • Serve it with honey, peanut butter or even jam.
kitchenspells.blogspot.com


You may also note
  • Caribbean recipes call for deep or shallow frying. To reduce the oil consumption I used a tawa - you could opt for frying it.

Sunday, 15 January 2017

Udupi Bread masala

New Year started on a pretty low note. Climate is amazing here in Dubai and so very apt for all sorts of infections! So after two weeks of medicines and rest, we are slowly getting back on track. 

Phew! finally food tastes like food! 
Two weeks almost made us forget what it was like to be foodies with our tongues absolutely losing its sense for taste. The beginning of a New Year went by and our third wedding anniversary too confined within blankets and cup after cup of ginger tea! Since it did not exactly feel like a New Year - we decided to postpone all our celebrations till we were fine and we are on the verge of recovery now. Now, I do wish we could have posted about a dinner date or romantic outing on our anniversary but never mind we did something special too! We took care of each other:) It is not easy having two sick people taking care of each other but we did tide through proving true the marriage vows we took three years back - 'In sickness and in health'! 

So while we are just beginning our new year celebration - why don't you guys quickly skim through the recipe we have for you. It has been a while since I have been to Udupi and in less than 3 weeks I am going to be there! So here is a Udupi recipe - made popular by the famous Diana Hotel.

kitchenspells.blogspot.com

Ingredients
(Serves - 3)
  1. White Bread - 8 slices
  2. Mustard seeds - 1/4 tsp
  3. Onion - 2 medium sized finely chopped
  4. Tomato - 1 big
  5. Ginger - 1 tsp chopped
  6. Garlic - 1 tsp chopped
  7. Green Chilly - 1
  8. Kashmiri chilly powder - 1 tsp
  9. Cloves - 2
  10. Cardamom - 2
  11. Cashew nuts - 8-10 pieces
  12. Milk - 1 cup
  13. Coriander leaves 
  14. Salt to taste
  15. Ghee
Method
  • Grind the ingredients listed from 4 to 11 into a fine paste.
  • Chop the bread slices into smaller squares or any random sizes.
  • Heat a tbsp of ghee in a skillet and add the mustard seeds. Once this pops, add the onions and saute until cooked.
  • To this, add the ground paste and cook until the raw smell of the masala goes away.
  • Adjust the salt at this stage and add milk. Bring it to a boil and simmer for a minute before switching off the flame.
  • Add the bread pieces in batches and combine well. Sprinkle corriander leaves and drizzle a tablespoon of ghee before serving it.
kitchenspells.blogspot.com

You may also note - 
  • Ideal for breakfast or evening snacks. You could make the gravy ahead of time and store it. Mix the bread pieces only before your serve else it may become too soggy and melt into the gravy.
  • Alternatively, you could also toast the bread with a little butter before adding it to the gravy for the crunch.
  • While serving it as snack you could garnish with finely chopped onion as well or even spring onions.

Tuesday, 3 January 2017

Slow roasted chicken with vegetables

The festive season is incomplete without my favorite dinner - Slow roasted chicken with vegetables.
It's been two years since we moved to Dubai and I have lost count of the number of times of I have made roast chicken. This was one thing that Shibin wanted to have ever since the decision to move to Dubai was made since his Mom made it for him when they were in Al-Ain!

My first attempt at baking a chicken was a total disaster. I marinated the chicken a day in advance and I froze it! I did not thaw it before moving it into the oven. It sat in the oven for 2 hours and never cooked. We had to chop the half cooked chicken and fry it on a pan. Also, I had to throw off the vegetables since it tasted disgusting with the marinade I made. I am talking of our Christmas dinner two years back and we had our dinner finally at 12 am!!

kitchenspells.blogspot.com

Ever since that episode, I have strived hard to perfect this - Tried different marinades and I stick to my favorite - seasoning of pepper, salt and lime juice.  This recipe would suit the beginners who want to give a shot at roasting whole chicken in the oven just like I began my roasting adventures!

Over to the recipe -


Ingredients
  1. Whole Chicken - 1 kg cleaned
  2. Potato - 2 large chopped in chunks
  3. Carrot - 2 chopped in chunks
  4. Red Onion - 2 chopped in chunks
  5. Olive oil - 3 tbsp
  6. Pepper powder  - 2 tbsp + 1 tsp coarsely ground 
  7. Lemon juice - 2 tbsp
  8. Garlic crushed - 5 to 6 cloves
  9. Salt to taste
  10. Mint leaves (optional)
Method
  • Pre-heat the oven to 220 degree centigrade.
  • Clean the whole chicken well inside and out. Remove the giblets and keep the skin of the chicken on. Set it aside to drain off excess water and creates gashes on the chicken with your knife.
  • Sprinkle 1 tsp of pepper and salt on the chopped vegetables and give it a good mix. Layer the bottom of baking tray with the vegetables and drizzle 1 tbsp of olive oil.
  • Rub the chicken with olive oil and season with pepper powder, salt and lemon juice. Stuff the chicken cavities with crushed garlic and mint leaves.
  • Place this on the baking tray layered with the veggies.
  • Move it into the oven and retain the 220 degree centigrade for the first 20 minutes.
  • Reduce the temperature to 180 degrees and bake for 90 minutes, increasing the temperature again for the last 5 minutes to 220 degrees.
  • The juice from the chicken seeps onto the layered vegetables which gives it a distinct flavor.
  • Remove from the oven and let it rest covered for 15 minutes.

kitchenspells.blogspot.com

You may also note
  • Baste the chicken and vegetables with a brush every 20 minutes while baking to ensure that the moisture stays and does not dry out.
  • The baking time varies depending on the oven size and the chicken size. Mine is a larger sized oven and hence takes considerably more time.  
  • You may marinate the chicken and refrigerate overnight.
  • Ensure that the chicken is completely defrosted before you begin cooking else may take a considerably longer time to cook.  
  • I prefer slow roasting the chicken because it gets juicy and the meat just falls apart. That is my idea of a baked chicken:)
  • You could tie together the legs of the chicken and another twine holding the wings together. It hold together the shape of the chicken and is believed to make it juicier.