Showing posts with label Kerala Mojo. Show all posts

Saturday, 31 March 2018

Nadan Kozhi Porichathu | Kerala Chicken Fry

With Easter just a day away marking the culmination of the Holy week and season of lent, Christian households would be prepping up a feast to celebrate the resurrection of Christ. Our celebrations often overshadow the real reason for the existence of such a day. To put it in a line - Easter Sunday celebrates resurrection of Jesus Christ from the tomb on the third day after crucifixion, fulfilling the prophecy that the Son of God would die for our sins and rise on the third day signifying eternal life.

With a good share of Indian Christian population in the Southern state of Kerala, Easter Sunday would witness a day of festivity both at church and at homes. Here is a recipe that you can add on to the menu - Nadan Kozhi Porichathu/ Kerala Chicken Fry.


kitchenspells.blogspot.com


Ingredients

To Marinate –
  • Chicken – 1 kg cut into medium or large pieces
  • Ginger- garlic paste – 2 tsp
  • Kashmiri chilli powder – 1 tsp
  • Red chilli powder – 1 tbsp
  • Turmeric powder – ½ tsp
  • Fennel powder – 1 tsp
  • Garam Masala – 1 tsp
  • Vinegar – 4 tsp
  • Salt to taste
  • Water 

For the masala - 
  • Coconut – ½ cup grated
  • Curry Leaf – 2 sprigs
  • Coconut oil – for deep frying
  • Red chilli powder – ½ tsp
  • Salt

 Method

  • Clean the chicken and pat dry them. Create gashes on the chicken for the marinade to seep in.
  • Prepare the marinade using the ingredients listed under ‘To Marinate’. Add water only if required to form the paste.
  • Marinate the chicken pieces in the marinade and set aside for a minimum of half an hour or maximum of a day in the refrigerator.
  • Heat oil in a deep pan, add the chicken pieces and fry on both the sides on medium flame until the chicken is cooked and a golden brown colour is attained.
  • Transfer this on to a kitchen towel to drain off excess oil. Transfer this to a serving dish.
  • Once all the batches of chicken have been fried, add coconut and curry leaf to the same oil along with chilli powder. Fry until the coconut turns light brown in colour.  It will continue to cook even after you take it off the flame. Spread this onto the chicken in the serving dish. Sprinkle a dash of salt over the dish and serve hot.

Sunday, 25 March 2018

Chemmeen Puttu | Prawns Steamed Rice Cake

Sundays are not a very happy day to wake up to, being the start of the week in Dubai - yet today morning I woke up refreshed and happy. Dubai has been my home for more than three years. I have got used to living here by now. Yet after packing off Shibin to office ( yeah, I mean it)  as I sat down with a cup of coffee, I felt the urge to wake up to the chatter of birds amidst luscious green trees and not to forget the occasional patter of rain drops during the monsoons. These imageries manifests my childhood!

I was brought up in a village named Chanthar, 4kms from the small town of Brahmavar to the north of the temple town of Udupi. My parents moved to this place post their marriage and has since been our home. Technology and trends were slow to reach this place but education never was! Even today this place sees a plethora of educational institutions. During the late 80s and early 90s, a large part of this area was under forest cover. Things began to change with the Konkan railways tracing their path through the remote area. Yet, a majority of places seemed unaffected. Truth be said - monkeys, rabbits, peacocks, fox, wild hens, a variety of birds made these forests their home.Stray cats and dogs were in plenty too. So were Snakes! I refrained from mentioning snakes along with the other animals because it gives me creeps and nightmares which I wake up to and fear moving any part of my body for the fear of touching a snake lurking around in the dark. 

Flora and fauna thrived in plenty. ( has changed a lot over the last 10 years I have to admit) Waking up to the chattering of birds or the rain drops falling on the roof tops slowly gliding towards the drains and making its final landing on the ground made our day. Wading through ankle high rain water to school was normal rainy season to us. Sitting in the patio as a family watching the winds sway the trees was a monsoon Saturday afternoon hobby. Bathing in the rain water was a pastime we looked forward to provided there were no thunder and lightning. Climbing the mango tree and the rose apple tree to pluck the fruits were our summer hobbies! Staying away from the hairy caterpillar was our winter agenda! It's sad that due to the unscrupulous ways of man, our next generation may never ever get to enjoy the God created amazing world, just the creation of man that were made destroying that of God. Yet they say, Nature has its way! 

I did not mean to mull over on the above subject this long but it just came by!
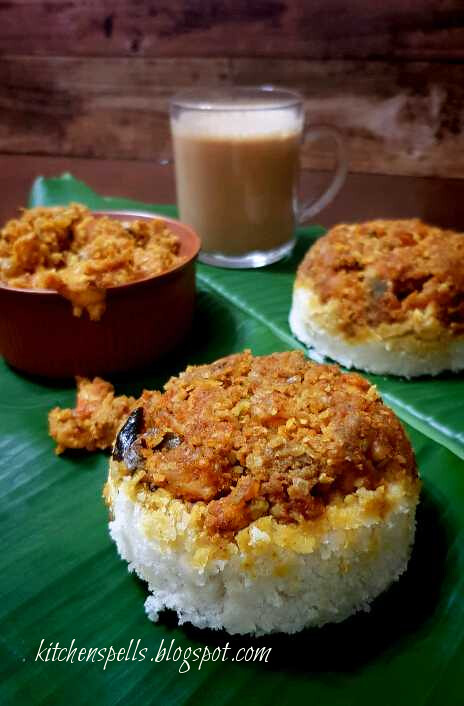
On to the recipe, puttu is indigenous to Kerala! Malayalees, I am sure will put up a fight for that:) Traditionally made by steaming rice flour with coconut and served with banana or kadala curry, today the dish has found many re-invented forms and combinations! About a year back I tried mixing some leftover puttu with left over prawns roast, the results of which were magnificent. Since then, I have been wanting to try a prawns topping with coconut in it to complement the puttu well! Puttu with no coconut is not puttu for me:)

Moving onto the recipe of Chemmeen Puttu -

Prawns Steamed Rice Cake


Ingredients

To Marinate – 
  1. Prawns – 750 gms (small size)
  2. Red chilli powder – 1 tsp
  3. Kashmiri chilli powder – 1 tbsp
  4. Pepper powder – ½ tsp
  5. Turmeric powder – ¼ tsp
  6. Fennel powder – 1 tsp

For the masala - 
  1. Onions – 3 finely chopped
  2. Ginger – 1 tbsp finely chopped
  3. Garlic – 1 tbsp finely chopped
  4. Coconut – ½ cup grated packed
  5. Cumin seeds – 1 tsp
  6. Curry Leaves – 2 sprigs
  7. Coconut oil – 2 tbsp

For Puttu - 
  1. Puttu podi/ Rice Flour – 2 cups
  2. Water – 1 to 2 cups
  3. Salt to taste

Method
  • Take the rice flour in a bowl and add salt. Sprinkle water over the flour as needed and begin mixing using your fingertips.
  • To check, take a handful of the flour mix and press it in your palms. First it should form a lump and on further prodding the lump should crumble.
  • Once the flour mix is done, press it down in the bowl and keep it aside covered.
  • Clean and de-vein the prawns. Use small size prawns. If the prawns are of bigger size, slice them into smaller pieces.
  • Marinate the prawns with the ingredients listed under marination and set aside for 20 minutes.
  • Dry grind the coconut and cumin seeds, set aside.
  • Heat coconut oil in a pan, add onions and saute until it wilts. Add curry leaves, ginger, garlic and saute until cooked.
  • Add marinated prawns to this, adjust salt and cook it covered for 5 minutes.
  • Add the coconut mix and cook for a while until the prawns are completely done.
  • Heat water for steaming the puttu. Layer the masala first in the puttu kutti and then add puttu podi. Steam the puttu for 5 minutes or till steam escapes from the top. ( done wither on top of pressure cooker or puttu kodam.
  • Serve it hot.

Saturday, 27 January 2018

Avalose Podi ||Cooking with family and friends - #6||

My sister was a picky eater. I have no choice but say 'was' because this time around when she came to Dubai I saw the 'pickiness' ( not too sure there is even a word as such) changing. It was not just her being picky but she hardly ate. Her favorite was chapati with chicken gravy ( she never touched the chicken in it though) So my Dad thought there is one easy girl to manage not much expenses on her food. This was until she grew up and then all she wanted to eat was non-veg food:) The hungriest time of the day was the gap between rushing from school at 4.30 pm ( read after throwing the shoes one under the cot and another under table, socks on the dining table and school bag on the sofa) and the play time which started at 5. We always rejected the option of left over morning puttu ( steamed rice cakes) for evening snack time. But our mother had her way. She would sprinkle a generous amount of sugar, mash in the bananas and feed us. That did taste out of the world - a dish we did not want to dig our hands into tasted so great when she fed us with love. That is how I love puttu even today as for my sister this is how she eats puttu - sprinkle sugar on puttu, eat a handful of that and then take a bite of the banana. When asked about her new style of eating, she says that she mixes and eats it only when mom is around to mash the banana in for her and she doesn't want to dirty her hands doing it herself.

kitchenspells.blogspot.com

Today's recipe is a dish that is eaten in the exact same way as puttu - sprinkle some sugar and mash in the ripe banana. It is usually eaten as a snack but hey, you could make it a breakfast dish too when you really do not want to cook anything else in the morning. I have done that:)

This is my 6th post in the series of Cooking with Family and Friends - this time around with my mom. We made this during my vacation in October to India. Also makes me think it is high time I post something that Shibin and I cook together on this series:)


kitchenspells.blogspot.com


Ingredients

  1. White Rice - 3 cups
  2. Coconut Grated - 2.5 cups
  3. Cumin seeds - 1 tbsp
Method
  • Wash and soak the rice in warm water for 3 to 4 hours
  • Drain off the water and spread the rice on a kitchen towel until it is completely dry. This takes about an hour
  • Dry grind the rice to powder
  • Add coconut and cumin seeds  to the rice powder and mix it thoroughly using your hands. 
  • Press this down tightly and keep this covered for an hour
  • Roast this in a wide pan until the color begins to turn to light brown. Roast in batches in case you do not have a wide pan.
  • Always keep on low flame and using a spatula keep moving the mix around so that it cooks evenly and does not stick onto the bottom of the pan. This process may take about 30 to 40 minutes. ( bit of work for your hands but totally worth it)
  • Let it cool and grind it to powder consistency. Sieve it and grind again until all the particles gain the same consistency
  • Store in an air tight container. It lasts outside for a month to two and if refrigerated longer.
  • Avalose podi is usually served with a sprinkle of sugar with banana mashed into it.

Wednesday, 6 December 2017

Kerala Mutton Stew

Christmas is a time that brings back so many memories. Some are funny as can be!
Good food comes with any celebration and Good food comes after so many failed attempts too! Christmas is no less.

Our first Christmas together was within a month of moving to Dubai. The cooking range oven and the griller were totally new to me. All that Shibin wanted for Christmas was 'Karangunna Chicken' - loosely translated rotating chicken. Don't whack your brains! He only meant to have those rotisserie grilled chicken :) I had my chicken marinated and for reason best known to no one I decided to place the marinated chicken in the freezer! We went out shopping got back a little late - just in time for dinner which was till in the freezer. I had no time to defrost. I placed it in the oven to melt the stubborn ice. After a while onto the rotisserie. The chicken was big and the marinade was all dripping down which is when I realised that I needed a dripping pan too. After all the trials , we still had an uncooked chicken two hours later and a messy oven. Then we did what we could do best. Cut the chicken and pan fried them. That is how we ended up eating our Christmas dinner at 12 am! Boy, I am glad we did not have any guests.

kitchenspells.blogspot.com


Moving onto the recipe. Whenever I hear mutton stew I cannot help but suppress a smile. Tell the same to my mother - she will have her volley of justifications. You will know why soon:) We were never very fond of mutton, so mutton was almost never bought at home. Once I happened to taste mutton stew with appam at a friends place for a wedding. I came home with a demand that it be mutton stew for Christmas morning instead of the usual chicken stew. Pappa bought mutton and Mamma set out to make it. The stew turned out fine but it tasted a wee bit different and had a sour taste. We went on to eat a stomach full. On her hunt for the curd she kept in glass mug to marinate the chicken for biriyani  (our Christmas lunch) did my mom realise that she had poured the curd into the stew instead of coconut milk that was in a similar cup! Nevertheless she says the stew turned out good and this how new things are discovered:) She is not going to spare me for this!

kitchenspells.blogspot.com

Here we go - 

Ingredients

  1. Mutton  – 500 gms
  2. Potato – 2 medium sliced
  3. Onion – 1 big thickly cut lengthwise 
  4. Green Chilly – 3-4 slit
  5. Ginger – 1 tbsp finely chopped
  6. Cardamom – 3 to 4
  7. Cinnamon sticks – 2 sticks of 1 inch
  8. Cloves – 3 to 4
  9. Thin coconut milk – 2 cups
  10. Thick coconut milk – ½ cup
  11. Salt as needed
  12. Water as needed
  13. Coconut oil

For Tempering

  1. Coconut oil – 2 tbsp
  2. Curry leaf – 2 sprigs
  3. Onion – 1 small sliced in cubes
  4. Peppercorns – 3 to 4

Method


  • Heat oil in a thick bottom pan. Add the whole spices and fry until aromatic.
  • Next, add onions, ginger and green chilly. Saute until the ginger is cooked.
  • Add mutton pieces and cook until the mutton is almost done. Pressure cook if need be.
  • Add the potatoes and adjust salt.
  • Add thin coconut milk and cook it covered until the mutton is done.
  • Add thick milk and switch off the flame as soon as the stew begins to boil.
  • For tempering, crush onion and pepper in a mortar and pestle.
  • Heat oil in a pan, add the crushed onion and pepper along with curry leaves. Saute till done.
  • Temper the stew with this mix. Keep it covered for a while.
  • Serve hot with appam!


Wednesday, 20 September 2017

Meen Peera| Kerala style fish in grated coconut

Dubai can sometimes be a lonely place. Things took a huge turn a few weeks ago when the Malayalees of the firm which Shibin works for announced an Onam - Eid get together. That was something to look forward for. I got all the more excited when I was asked to join for Thiruvathira. Old traits seldom die:) I love dancing and this opportunity was just so perfect for me. What started off as a mundane Thiruvathira for the ladies and oppana for the kids geared up all the ladies who had let go off all the inhibitions and decided that they wanted to do more. As luck would have it Jimki Kammal Dance Challenge was going places and we decided to do our part as well. It was a simple suggestion by one of the ladies and others were more than eager to join in. The practice that started off in a single song, finally ended in a fusion of three. Despite stage fear, chances of forgetting steps and also the melodrama of having to dance in a saree - we did it! It may not have been the most perfect dance but there is no denying that we perfectly enjoyed every moment of it. We carry no regrets and we are proud our practice paid off!  The Onam celebrations started off with a pookalam, maveli varavelppu and continued to the cultural programs, sadya, tug of war, singari melam to name a few. Every event had its charm but it was the enthusiasm of the people that undeniably made an otherwise normal weekend - a one to remember for months to come. Age was not a bar as everyone present joined the singari melam ensemble and danced away into the evening. As for the employees of the company, 'hi-bye-smile' relationships turned more meaningful and for me I made some wonderful friends!

It is a week now, we still longingly look at the photos and videos that are being circulated. Having said that, it is time to post our next recipe - Meen Peera which is traditional to Kerala. It is a dry fish preparation usually using small fish varieties and grated coconut that serves as a side dish to the meal.


kitchenspells.blogspot.com

Ingredients
  1. Fish - 1 kg ( preferably the smaller fish like Natholi/Anchovy, Mathi/Sardines, Cheriya Aila/Small Mackerel)
  2. Coconut grated - 1.5 cup loosely packed
  3. Ginger - 1 tbsp grated heaped
  4. Shallots/ cheriya ulli - 8 to 10  can be replaced with onions
  5. Kudampulli - 2 -3 pieces
  6. Tumeric powder - 1 tsp
  7. Green chilli - 5-6
  8. Curry Leaves - 2 sprigs
  9. Salt to taste
  10. Water
Method
  • Clean the fish and drain off any excess water.
  • Coarsely grind together coconut, ginger, shallots, green chilly and turmeric. This can be done on a grinding stone, mortar and pestle or in a mixer pulsing it just once or twice.
  • Add this coarsely ground coconut masala to an earthen pot, add the fish along with curry leaves and kudampulli. Sprinkle salt and add half a cup of water.
  • Cook this on low flame for 15-20 minutes until the fish is almost done and leave it open for 5 minutes for any excess water to drain off.
  • Best when served along with rice.
kitchenspells.blogspot.com

You may also note- 
  • Avoid stirring, this tends to break the fish. Using a kitchen towel, hold on to both the sides of the pot and gently toss if need be.
  • Earthen pot has a very high smoking point, hence cooking on low flame ensures that the bottom does not burn.

Sunday, 3 September 2017

Pineapple Rava Payasam

Festivities seem to gain more vigour and valour when you are away from your home country. Onam is one such festival and you can find onam celebrations happening till it is time for Christmas celebrations. Every weekend for the next two months in the UAE you are sure to find atleast one person in the traditional Kerala kasavu mundu/saree heading for Onam celebration somewhere. Pookalam ( floral designs), Thiruvathira (traditional dance form),vadam vali (tug of war), sadya (the grand meal) all form a part of this rich festival. This year is no less and I am counting on 3 sadyas this year.

Just like Cake is to Christmas, Payasam is to Onam!

kitchenspells.blogspot.com


Make a sadya or not -payasam is inevitable. This year I wanted to try some milk based payasam other than the semiya payasam. That is when my cousin suggested pineapple. I googled up a few recipes but wasn't quite convinced to try it out myself. Pineapple Rava Kesaribath is one of my favorite food - that is when it struck me to incorporate rava also into the payasam. This payasam just happens to be a modified milky version of the Kesaribath.

kitchenspells.blogspot.com


Ingredients

  1. Pineapple - 1 cup
  2. Rava/Semolina - 1/4 cup
  3. Milk - 2 cups
  4. Water - 1 cup
  5. Sugar - 1/4 cup
  6. Cardamom powder - 1/4 tsp
  7. Raisins 
  8. Cashewnuts
  9. Ghee - 3-4 tbsp
Method
  • Heat ghee in a deep bottom pan and fry the cashew nuts and raisins till it turns golden brown and fluffs up respectively.
  • In the same pan, add the chopped pineapples and fry till the color begins to slightly change color. 
  • Remove the pineapples from the ghee and add semolina/rava. Fry till the color begins to change. Ensure not to burn it.
  • Add 1 cup of water along with sugar and let this cook on low flame for 2 to 3 minutes.
  • Pour in the milk and keep stirring for 5 to 10 minutes until the payasam reduces and thickens.
  • Add the cardamom powder along with the pineapples.Cook for another 2 minutes before finally adding the raisins and cashew nuts and switching off the flame.
You may also note
  • Keep stirring the payasam inorder to prevent it from burning at the bottom.
  • Pineapples can be added at two stages. Either along with water at the beginning or at the end. Some bloggers have mentioned curdling of milk if the pineapples are added at the beginning. However mine did not curdle although I added it along with water right at the beginning. If you are skeptical, you could always add it at the end like mentioned in the recipe above.

Padavalanga Parippu Charu/Curry

kitchenspells.blogspot.com

Onam is here again and it is inevitable that my blog gets adorned with atleast one recipe for the season. I am , as my ex-boss called me NRK - Non Resident Malayalee!! I have spent most of my life in Karnataka and wee bit in Dubai now. I used to look forward to Onam falling on weekends. Only then would I be able to catch all the new movies on Asianet and Surya TV. Vegetarian food was not something I was fond of so sadya was not something that I looked forward to. Occasionally, my sister and I, plucked flowers from my mom's garden and made a small pookalam in our porch. Things changed when I moved to college. With more malayalees, Kerala Kasavu Saree on Onam became a mandate, pookalam a necessity and sadya the inevitable.

I slowly began appreciating the vegetarian delicacies on the leaf and eventually falling in love with them. It took a couple of more years to familiarize with the sadya dishes and the last three onam sadyas have been eventful! Looking forward to another one this year as I post this recipe.

This recipe was shared by my cousin Vinitha - we made it twice so far and the plate was wiped clean!

Here is the recipe for Padavalenga Parippu Charu - 

kitchenspells.blogspot.com

Ingredients

  1. Padavalenga/Snake gourd - 700 gms cubed
  2. Toor Dal - 1/2 cup
  3. Onions - 1 thinly sliced
  4. Green Chilly - 2 slit
  5. Ginger - 1/2 tsp grated
  6. Garlic - 1/2 tsp grated
  7. Coconut - 1/2 cup grated tightly packed
  8. Turmeric powder - 1/2 tsp
  9. Cumin seeds - 1/2 tsp
  10. Curry Leaves - 2 sprigs
  11. Coconut Oil - 1 tbsp
  12. Salt to taste
  13. Water
For Tempering:
  1. Curry Leaves - 2 sprigs
  2. Mustard seeds - 1 tsp
  3. Red chilly- 2
  4. Coconut - 2 tsp grated
  5. Coconut oil - 1 tbsp
Method
  • Wash toor dal in water, drain and set aside.
  • Add oil into a pressure cooker. Saute chopped onions, ginger, garlic, green chilly and curry leaves for 2 to 3 minutes.
  • To this, add salt and turmeric powder. Saute for another minute before adding the toor dal and snake gourd. Add enough water to just cover the ingredients.
  • Cover and pressure cook on high flame for 2 whistles. Let the pressure release before opening the cooker.
  • Coarsely grind together coconut, turmeric powder and cumin seeds. Add this to the pressure cooker. Let it boil for another 5 minutes and turn off the flame.
  • For tempering, heat oil in a pan, add mustard seeds. Once it splutters add grated coconut , red chilly and curry leaves. Fry this till the coconut begins to brown.
  • Add the tempering to the curry.

Tuesday, 20 June 2017

Kozhi Nirachathu / Stuffed Chicken with gravy

kitchenspells.blogspot.com


We first ordered Kozhi Nirachathu at a popular restaurant in the UAE. We ended up with a butterflied chicken in a spicy masala along with a side of egg roast which absolutely did not complement each other that too at an exorbitant price! After almost a year we got to taste this dish again at another restaurant. This time the egg roast stuffed inside the chicken and the chicken was deep fried - it tasted heavenly.  I was skeptical of getting a whole chicken deep fried until I read up a few recipes and saw a couple of videos. Yes, you can actually cook a whole chicken on stove top without deep frying it! It is not all that time consuming either.

Kozhi Nirachathu or stuffed chicken with gravy is a dish from Kerala that involves cooking a whole chicken with gravy and egg roast stuffed in the cavity.  Egg roast is made separately and stuffed into the marinated whole chicken before cooking the chicken in the gravy. When you want a whole chicken on table and you do not have an oven to rely on this could be your go to recipe! 

kitchenspells.blogspot.com

Ingredients
  1. Whole chicken - 900 gm
  2. Egg - 2 no.s
  3. Onion  - 4 big ones finely chopped
  4. Tomato - 2 finely chopped
  5. Green Chilly - 2 finely chopped
  6. Ginger garlic paste  - 2 tsp
  7. Chilly powder - 1 tbsp + ½ tsp +¼ tsp
  8. Coriander powder - 1 tbsp
  9. Turmeric powder - ¼ tsp
  10. Fennel powder - 1 tsp
  11. Garam Masala - 1 tsp
  12. Curry Leaves - 3 sprigs
  13. Water - ¼ cup
  14. Coconut Oil
To Marinate
  1. Chilly powder - 1 tbsp
  2. Turmeric powder - ¼ tsp
  3. Lime juice - 2 tbsp
  4. Salt
Method
  • Hard boil the eggs, shell and keep aside. Create cuts on the egg and roll it in ¼ tsp of chilly powder until well coated. Fry this for 2 minutes in a teaspoon of oil rotating until done on all sides
  • Remove the skin, clean and pat dry whole chicken. Create deep gashes on the chicken. Make a marinade by mixing together the chilly powder, turmeric powder, salt and lime juice.  Rub this well onto the chicken and the cavity too. Let it rest on counter top for about an hour.
  • Heat oil in a deep pan ( use extra oil than you would use for normal chicken curry). Add onions into the pan and saute till transparent.
  • Add ginger garlic paste, curry leaves and green chilly. Let it cook down.
  • At this point,separate 4 tbsp masala into another pan. Add ½ tsp of chilly powder to this and cook well.  Add 2 tbsp of chopped tomato and let it melt.  Add the fried eggs and coat the masala. Let it cook for another minute. Turn off the flame and set aside.
  • Meanwhile, add the remaining chilly powder, turmeric powder, coriander powder, fennel powder and garam masala into the main pan. Let the masala cook before adding tomato. Mix well and keep it covered until the tomato melts.
  • Add salt and water to this bring it to boil and turn off.
  • Stuff the egg masala into the cavity and using a twine tie together the legs of the chicken to close the cavity so that the masala stuffed in does not seep out. Tie together the wings as well. 
  • Place this in the deep bottomed pan. Spoon masala over the chicken and let it cook on high for 5 minutes. Reduce the flame and let the chicken cook. Flip over the chicken once a while ensuring that the chicken is always well coated in the masala. It takes about 30 minutes to an hour for the chicken to cook completely. Uncover and cook the chicken for the last ten minutes. The masala reduces and begins to change color to brownish red.
  • Transfer to a serving dish and serve it with choice of bread or rice.
You may also note - 
  • Turning over a whole chicken may be difficult, use two spatulas to support while turning it over.
  • Keep pouring spoonful of the gravy onto the chicken top and let the flavor seep in.
  • There are chances that the chicken may stick to the vessel and burn. So make sure to turn it over frequently!

Monday, 12 June 2017

Irachi Petti - Malabar Iftar recipe

I always knew of Ramadan but it is only after moving to UAE, I realised how religiously it is observed and what iftar and suhoor mean! The world of blogging introduced me to a lot of Malabar snacks mostly fried but really mouth watering. I tend to stay away from deep fried stuff, primarily because I have pimples popping on my face as soon as I relish on anything fried. Since it is shorter office timings during Ramadan, my husband one day happened to come home with some snacks that he picked up from the local Kerala cafeteria for our evening tea together (that is a rarity too - happens only during Ramadan). It was all deep fried stuff and I could not resist it - pakoda, samosa, irachi petti, chatti pathiri, mulagu bajji, ulli vada. It was all there. I waited for two days after we had this - Yay! No pimples and that made my resolution to prepare a fried malabar snack stronger.

That is how I ended up making irachi petti with the minced meat I had in the fridge. Irachi means meat and petti means box. So basically this dish has meat filling that is sealed in a box made of crepe!
So here is a recipe to try this Ramadan!

kitchenspells.blogspot.com

Ingredients

For the filling

  1. Minced meat - 400 gms (beef, mutton or chicken)
  2. Onion - 3 medium finely chopped
  3. Ginger - 2 tbsp
  4. Garlic - 2 tsp
  5. Green Chilli - 3 finely chopped
  6. Pepper powder - 1 tsp
  7. Turmeric powder - 1/4 tsp
  8. Coriander powder - 1 tbsp
  9. Garam masala - 1 tsp
  10. Lime juice - 1 tbsp
  11. Salt to taste
  12. Oil
For the crepe
  1. All purpose flour - 1 cup
  2. Egg - 1 beaten
  3. Salt to taste
  4. Water as needed
For coating
  1. Egg - 1 beaten
  2. Bread crumbs
  3. Oil
Method
  • Heat oil in a pan. Fry the onions until it softens and add the ginger, garlic and green chilly. Saute till the raw smell disappears.
  • Add the turmeric powder, corriander powder and pepper powder. Cook the masala and add the minced meat. Mix it well to coat.
  • Add salt and keep it covered until it is cooked. Adjust salt if need be and add lime juice. Turn off the flame.
  • Prepare the crepe batter by mixing together the flour, egg, water and salt in a bowl. Add water as needed to form a runny batter.
  • Heat a tawa and pour a laddle full of batter onto the hot tawa. Ensure that the flame is on medium and prepare the round crepe by running the laddle in a circular pattern on the batter.
  • Flip over once and cooked gently. Do not let it get crisp as it might break open while placing the filling.
  • This batter makes around 8 crepes.
How to fill the crepe and fry
  • Take one of the crepe and place two spoonful of filling on the center of the round crepe. Using the same spoon adjust the filling to form either a square shape or a rectangle shape. This is done just to make the irachi petti hold the shape.
  • In order to cover the filling, first fold over one side towards the top of the filling, such that the bend in the fold is at the point where the filling ends.Repeat the same with the opposite side.
  •  Now fold the other two ends one at a time thereby sealing the filling in ( may form a square or a rectangle shape). It is always better to have larger crepes made so that the folding is easy and it stays. Smaller folded flaps tend to open up while cooking.
  • Place this on a plate with the folded flaps facing down. Repeat the same with other crepes.
  • Heat oil in a pan,  Dip each of the petti in the beaten egg and coat it with bread crumbs. Then place the petti in the pan with the flap side facing down. Cook till it browns well on one side and then flip over.
  • Serve hot !!
kitchenspells.blogspot.com

You may also note
  • You may add corriander leaves to the meat filling.
  • Once the crepe has been folded always place it with the flap facing downward so that the weight tends to hold the flap in place.
  • I prefer shallow frying but you may also deep fry it.


Saturday, 25 February 2017

Kerala Chicken Biriyani || Cooking with Family and Friends - #3 ||

kitchenspells.blogspot.com


Biriyani is a feast in itself for most Indians but when it came to our PG gang ( running into the pre-wedding days for a while), biriyani was the solution to depression as well. Every emotion we could think of was followed by ordering biriyani from Mughal Empire in AECS Layout. We got a hike - its biriyani, we are tired - its biriyani, we got reprimanded by parents - its biriyani, manager gave us a earful - biriyani again, had a tiff with friends - biriyani all over again. Every emotion had a solution - Mughal Empire Biriyani. The guy taking the order at Mughal Empire need not be reminded of the address and the quantity - the only thing that varied was the type between chicken and fish. We lost count of the times we have ordered it but washed and kept intact all the 'white dabbas' they came in, only to be thrown out during every cleaning session!

This is how biriyani became part of my life - we tried making biriyani couple of times when in the PG - none too successful. We either had overcooked rice or runny masala gravy - well loads of other things can go wrong too!! That did not stop my attempts at biriyani and  my first success was with my mother-in-law's recipe. So this vacation we made it all over again to celebrate Shibin's birthday - she led from the front and I just followed her cues.

So third in the series of Cooking with family is Kerala Chicken Biriyani with mom-in-law.

kitchenspells.blogspot.com

Ingredients
( serves - 8)

For the chicken masala

  1. Chicken - 1 kg
  2. Turmeric powder - 1/4 tsp
  3. Yogurt - 3 tbsp
  4. Onion - 3 sliced
  5. Ginger garlic paste - 1 tbsp
  6. Red chilly powder - 1 tsp
  7. Turmeric powder - 1/4 tsp
  8. Coriander powder - 2 tsp
  9. Pepper powder - 1/2 tsp
  10. Tomato - 1 sliced
  11. Curry leaves - 1 sprig
  12. Coconut - 1 cup grated
  13. Green Chilly - 4 
  14. Coriander leaves - 1 cup tightly packed
  15. Mint Leaves - 1/4 cup tightly packed
  16. Ghee
  17. Salt
For the rice
  1. Basmati Rice - 4 cups
  2. Water - 8 cups
  3. Cinnamon - 3
  4. Cardamom - 1 inch
  5. Cloves - 4
  6. Bay Leaves - 2
  7. Lemon Juice - 2 tbsp
  8. Ghee - 3 tbsp
  9. Salt
For the Garnish
  1. Raisins - 15
  2. Cashew - 15
  3. Onion - 2 finely sliced
  4. Coriander leaves
Method

  • Wash and soak the basmati rice for 30 minutes in warm water. Heat ghee in a deep vessel and add the spices - cinnamon, cardamom, cloves and bay leaves. Fry this for a minute on low flame before adding the drained basmati rice. Stir it till the first splutter of rice. Add boiling water to this and squeeze in the lemon juice. Adjust the salt level and cook till done and fragrant.
  • Marinate the Biriyani cut chicken pieces in turmeric, yogurt and salt for 30 minutes.
  • Heat ghee in a pan and add the onions. Cook till the onions begin to wilt and add the ginger garlic paste. Once the rawness of the paste disappears add in the masala - red chilly powder, turmeric powder, coriander powder and pepper powder. Once done, add the marinated chicken along with the sliced tomato, curry leaves and let it cook covered.
  • Grind together the coconut, mint leaves, corriander leaves and the green chilly. Add a little water to aid the grinding. When the chicken is almost done, add this paste and let it cook further. Adjust the salt.
  • Layering the biriyani - Take a thick bottomed pan and begin layering the rice and the masala alternatively beginning with a thin layer of  rice, followed by the chicken masala and ending with rice. You may create 2 to 3 layers.
  • Cover this and place it on low flame until the steam emerges while removing the lid - may take about 5 - 10 minutes.
  • Garnish the biriyani with onions, cashew and raisins fried in ghee. Adding of freshly chopped coriander leaves enhances the look and taste.

kitchenspells.blogspot.com

You may also note - 
  • Once the rice is cooked, use a fork only to separate the grains.
  • I prefer using ghee while making biriyani - this might as well be replaced by other cooking oil but try to stick to ghee while cooking the basmati rice.


Friday, 22 April 2016

Fish Mappas/ Meen Mappas

Fish Mappas or Meen Mappas is a traditional Kerala recipe flavored by the addition of coconut milk. This is served along with appam, idiyappam or bread roll. 

My recipe is an adaptation of the one I had seen on cookery show - Shappile curry naville ruchiyum on television. I have tried this recipe a couple of times with different fishes like Karimeen and Vatta. It turned out the best with Neymeen/ King Fish which I made this time and we finally decided to put it up in the blog.

Unlike fish molly, mappas is a little tangy due to the addition of kudampali/ pot tamarind and blends well along with the creaminess of coconut milk. This recipe is now a favorite with us.

kitchenspells.blogspot.com


So, here you go - 

Ingredients

  1. Fish slices - 9-10 pieces( I used King Fish - you may use karimeen or pomfret also)
  2. Onion - 2 medium sliced lengthwise
  3. Green Chilly - 4-5 slit
  4. Ginger - 2 tsps chopped
  5. Tomato -1 medium sliced lengthwise
  6. Fenugreek seeds - 1/2 tsp
  7. Mustard seeds - 1/2 tsp
  8. Turmeric powder - 1/2 tsp
  9. Coriander powder - 2 tbsp
  10. Coconut milk - 1 coconut
  11. Curry Leaf - 1 sprig
  12. Kodam pulli/ pot tamarind - 2 pieces
  13. Coconut oil - 2 tbsp
Method

Being a Keralite, I am used to making fish curry in mann chatti/ earthern pot. It somehow gives me a feeling that I am home :) However, it is not mandatory to use one. Any pot would do. 

Heat the oil and add the fenugreek seeds. Add mustard seeds and when it splutters toss in the chopped onions along with the ginger. Saute it, till the raw smell goes away and add the green chilly. 

When the green chilly slowly begins to change color, add turmeric powder and coriander powder. Stir till the masala gets cooked. 

I usually take the milk from freshly grated coconut. You may use store bought coconut milk as well. 
For those using fresh coconut milk, you may take the milk twice - thick milk and thin milk.

Add the thin milk and once it boils, place the fish slices into the pot along with tomato slices and pot tamarind.

Bring this to boil and simmer it on low flame covered till the fish gets cooked. Then add the thick milk. Switch off the flame as soon as the gravy comes to a boil. Avoid stirring the fish curry once cooked as the fish being tender, tend to fall apart.

Garnish with curry leaves.

Does not take a very long time to cook and a perfect recipe for weekend get together with friends and family.

kitchenspells.blogspot.com


Thursday, 24 March 2016

Dates Vattayappam

Vattayappam is a popular Kerala delicacy, which traditionally was made in households with left-over appam batter. However now, most of the bakeries in Kerala sell packaged Vattayappam. This can never beat the freshly prepared homemade ones.  

Vattayappams are steamed soft rice cakes with a perfect blend of coconut and fermented by yeast to make it fluffy. This is definitely on my Easter Menu.You guy's better rethink yours:)

Vattayapam usually has cashew nuts and raisins for richness along with a tinge of cardamom. My recipe has a whole lot of dates which gives it the sweetness and of course you may do away with the sugar that you add. 
I picked this recipe from my mother-in-law :)

kitchenspells.blogspot.com


Ingredients

  1. Dosa Rice/White Rice -1 cup
  2. Dates - 40 to 50 - you may reduce or increase as per your choice.
  3. Coconut - 3/4 cup grated
  4. Cardamom powder -1/4 tsp
  5. Boiled rice - 1/4 cup
  6. Cashew nuts and raisins -a handful
  7. Salt to taste
  8. Yeast -1tbsp
  9. Water -1 cup


Method

Soak the rice and de-seeded dates over night in water separately. Wash the rice and strain the water.

Blend together the rice, dates, water, boiled rice, grated coconut in batches and pour into a deep vessel since the batter rises after adding yeast. Add cardamom powder to this and mix well.

Soak yeast in 4 to 5 tbsps of warm water for about 20 minutes till it becomes foamy and is fermented.

Mix the yeast with the batter and keep the vessel closed and in a warm place to let it ferment for at least 6 hours or till it rises.

Add salt once the batter has risen and stir it just enough for the salt to mix.

I have used cake pans in idli cooker to steam the cake. You may alternatively use a deep steel plate. Just grease the plate with a little ghee. Pour the batter into the dish and top it with nuts and raisins. Kerala bananas also make a good topping.

Steam this for 20 minutes. Remove from the flame and set aside for cooling. Wedge it out of the dish once cool and cut into shapes of your choice.

Wednesday, 26 August 2015

Mathenga Vanpayar Erissery

Just done with Onam shopping. The crowd at Lulu, here in Dubai was beyond compare. Brands - Nirapara, Eastern, Brahmins, Double Horse setting up their own counters with special Onam discounts and goodies. Phew!! That was one hell of a time wading through alleys with the pushcart avoiding getting hit and making sure you don't hit anyone. I guess that is the joy of this festival. 

Onam is that festival that brings together malayalees irrespective of religion. Onakkodi, Pookalam, Payasam, Sadya and all malayalees together whether in India or outside - that is Onam.

Today's post is my mother - in  - laws recipe. A dish that I really love - Erissery made with mathenga and vanpayar.

kitchenspells.blogspot.com

Here is the recipe - 

Ingredients
  1. Onion - 1 small sliced
  2. Garlic - 2 pods sliced lengthwise
  3. Green Chilly - 2-3
  4. Coconut - 1 cup grated
  5. Jeera/ Cumin seeds - 1 tsp
  6. Turmeric powder - 1/4 tsp
  7. Mathenga/ Pumpkin - 1/4 kg diced
  8. Vanpayar - a handful
  9. salt to taste
For tempering 
  1. Mustard seeds - 1 tsp
  2. Shallots - 2 sliced
  3. Grated coconut - 2 tsp
  4. Red chilly powder - 1/2 tsp
  5. Curry Leaf - 1 sprig
Method

Pressure cook vanpayar with a little salt and keep it aside.

Toss in mathenga, onion, garlic and green chilly into a heavy bottomed pan. Add sufficient amount of water and bring it to boil on high flame. Reduce the flame and let it simmer till the mathenga is cooked. Mash this with a spoon to form a paste.

Wet grind the grated coconut, cumin seeds and turmeric powder and add this to the mashed gravy. Pour in water if necessary and let it cook for another 10 minutes.
Add vanpayar and season it with sufficient salt.

In a skillet heat coconut oil - toss in the mustard seeds and let it splutter. Add shallots and grated coconut and fry till the color changes to brown. Add the chilly powder and curry leaves and pour over the erissery.

Serve over rice with a dash of ghee for Onam.

kitchenspells.blogspot.com


Monday, 24 August 2015

Vendekka Mezhukkupuratti/ Lady's Finger Stir Fry/ Okra Stir Fry

Vendekka or Lady's finger has never been my favorite vegetable. I found it quite slimy and difficult to eat. Marriage makes you do things that you never thought you would.
Yes, I do cook Vendekka now and eat it as well because my husband loves it. What my mother could not do in years my husband managed in months! That's what marriage can do to you:)
No regrets!

Here is a very simple recipe for you this Onam straight from the USA. Safeera is a college mate of mine who sent across this recipe and managed to click some impressive pictures as well using yam leaf plucked from her backyard instead of banana leaf for a change.

There you go -

Ingredients

Vendekka/ Okra/ Lady's Finger - 1/2 kg
Tomato - 1 chopped
Onion - 1 chopped
Green Chilly - 1 to 2 slit
Curry Leaves - 1 sprig
Coconut Oil
Salt to taste

Method

Slit the vendekka and cut into 2 inch long pieces.

Pour the oil into a skillet, add the mustard seeds. When the seeds splutter add curry leaves and green chilly. Saute it and toss in the vendekka, tomato, onion and salt.

Cook it covered for about 10 minutes.

There it is your Lady's Finger Stir Fry.


You may also note -

  • Wash and pat dry the vendekka before you slice.


Sunday, 23 August 2015

Ishtu - potato paalu curry

When I was on the lookout for Onam recipes, it was Vineetha who suggested Ishtu. I had no idea that this was an Onam dish that is pretty popular in the Thrissur region. It is quite fascinating to  note that same dish is called by different names with very slight variations in the recipes. Had I not begun a quest of Onam recipes may be I would not have known either.

Oh I forgot to introduce Vineetha - she is my TALL friend - yes I mean it literally. One thing I hate doing with her is posing with her for a photograph - so my height is left to your imagination. She is miles across in Brisbane and is currently busy shopping for Onam. This is a recipe from her kitchen.
I miss you Vineetha and there goes your recipe -

Ingredients:

Potatoes - 2 medium diced
Onions - 2 medium sliced
Ginger - 1 inch piece finely chopped
Green Chilly - 2 slit
Coconut Milk - 1 cup
Water - 1/2 cup
Curry Leaves - 1 sprig
Coconut Oil
Salt to taste

Method:

Add the potatoes, onions, ginger and green chilly to a pressure cooker with water and required salt. Pressure cook it to 2 whistles.
Once the pressure is released, you can mash a few pieces of potato and put it back into the gravy.This thickens the curry.
Next add the coconut milk and bring it to a boil.Cook it on a low flame for a few more minutes till it becomes thick.
Finally add the curry leaves and drizzle some coconut oil.

Simple is it not? So why not make this a part of Onam Sadhya this year.

kitchenspells.blogspot.com


Friday, 21 August 2015

Sambhar

Sambhar is a traditional South Indian dish. I am not sure which state it belongs to - Kerala, Karnataka and Tamil Nadu seems to have adapted it as per their flavors and taste. It adorns the banana leaf for the festivities in each of the states. Sambhar is a popular dish for Onam as well and again the taste differs from the north to the south of Kerala. Here is an easy recipe for Sambhar, if you are hunting for one. 

The recipe was sent by Vinitha, my cousin. She is a wonderful cook, probably inherited our grandmother's cooking traits. We have had our fair share of cooking experiments together during the summer vacations at school.

Here is the recipe she has for you - 

Ingredients

Toor Dal - 1/2 cup
Turmeric powder - 1/4 tsp
Kaayam/Hing/Asafoetida - 1 small piece
Onion - 1 sliced lengthwise
Lady's Finger - 4 sliced
Potato - 2 medium sized sliced
Brinjal - 1 medium size sliced
Carrot - 1 sliced
Green Chilly - 2 slit
Tomato - 1 medium sized sliced
Tamarind - 1 lemon sized ball
Sambhar powder - 2 tbsp
Salt to taste


For Tempering 

Mustard seeds -1/4 tsp
Red Chilly - 2
Curry Leaves - 1 sprig
Shallots/Sambhar Ulli - 2 tsp chopped
Method
Pressure cook the dal with salt and turmeric powder.Soak tamarind in warm water for about 15 minutes and strain the water. Keep this aside.In a skillet, heat oil and saute the kayam for a minute and then add the onions. Once the onions are slightly cooked, add all the vegetables except tomato . Saute it for few minutes and pour the excess water from cooking the dal into the vegetables and let it boil on low flame covered. Add a little bit of salt and turmeric powder to the vegetables. While it begins to boil, add sliced tomato, cooked dal and the tamarind water. Let it boil. Add the sambhar powder, mix well and let it boil. Once the potato is cooked, switch off the flame. In another pan, heat oil. Add mustard seeds and let it splutter, add shallots, saute it well till translucent. Then add the red chilly and curry leaves. Pour it onto the hot sambhar and mix it well.Yummy yummy sambhar ready!

kitchenspells.blogspot.com

You may also note - 
  • Add any veggies as per your choice. Each veggie may have a different cooking time, so you may add the vegetables one after the other. I also love using drumsticks and cucumber in my sambhar.
  • It is a great way to have lot of veggies at one go.
  • Avoid pressure cooking the veggies, it may get overcooked.


Tuesday, 18 August 2015

Kootu Curry

I had Kootu Curry just once before for a Onam Sadya at a friend's place. Somehow, I did not quite think of trying it out myself until this Onam season. And I am inclined to believe that I just got the perfect recipe for it. Thanks to Sreelakshmi or should I say her Mom?

Sreelakshmi is a good buddy of mine and we have had some really wonderful times together. Hoping to catch up soon:)

Thank You Sreelakshmi for this amazing recipe. We just loved it!

With no further ado, let us get to the recipe.
kitchenspells.blogspot.com


Ingredients

Raw Banana - 2
Yam/ Chena - 1/4 kg
Brown Kadala/ Black Channa - 1/2 cup (soaked overnight)
Jaggery - 100 gms grated
Coconut - 1/2 cup grated + 2 tbsp
Green Chilly - 2-3 
Jeera - 1/2 tsp
Mustard seeds - 1/4 tsp
Dried red chilly - 4-5
Turmeric powder - 1/4 tsp
Chilly powder - 3/4 tsp
Coconut Oil
Curry Leaves
Salt to taste

Method
Soak the kadala overnight. Pressure cook with chilly powder and turmeric powder. Slice Raw Banana & Yam into small cubes and add this to the kadala. Let it cook for about 20 minutes on medium flame. 
Grind the grated coconut with jeera, green chilly and a pinch of turmeric powder. Add this mixture to the cooked vegetables and kadala. Add the grated jaggery to it and mix well (without mashing your veggies) Heat oil in a skillet, add mustard seeds and let it splutter. Add dried red chilly and 2 tbsp coconut. Fry till coconut turns brown and add the curry leaves.
Toss this to the curry. Tada! Its done.
kitchenspells.blogspot.com
You may also note -
  1. Do not over cook the kadala or the veggies.
  2. This is a dry curry, ensure to add just enough water.
  3. Be careful while stirring, do not mash the vegetables.


Saturday, 15 August 2015

Ela Appam/ Ela Ada - with banana

How many of you knew that ela ada or ela appam is a popular Onam breakfast recipe?

Well, I did not, until quite recently. For me, Onam was all about an elaborate afternoon Onam sadya.

So why not have a breakfast dish as well to spice up the Onam celebration on the blog:)

I have never made ela appam before and I do not remember it being my favorite when my mom made it for us in the evenings after school. It's been so many years now and I definitely wanted to make this.
Banana leaf used to wrap the appam gives the ela appam a distinct flavor and aroma that will tickle your taste buds. I tried the ela appam infusing a little of banana as well. We enjoyed the final product!


Ingredients

  1. Roasted Rice Flour - 2 cups
  2. Boiled Water - 1.5 cup
  3. Jaggery - 250 gms grated
  4. Coconut - 1 cup grated
  5. Banana - 1 ripened
  6. Banana leaf
  7. Salt to taste
Method

Mix the jaggery with coconut and keep aside.

Boil water , add salt and the rice flour in parts, continuously folding it together with a fork. Once the entire flour has been folded in, let it rest for a while. Let the mixture cool, meanwhile mash the banana. 

Add the mashed banana into the mixture and fold it well with your hands. Make balls out of the mixture.

Take a banana leaf, wash it, pat dry and run it over the flame. This prevents breakage when you later make the appam.

Place a rice ball on the leaf. Wet your hands and gently press it creating round shape as you go along.
Place a generous amount of filling over one half of the pressed dough. Fold it into half along with the leaf.  Gently press the edges to hold it together.Fold the edges of the banana leaf and place it in a steamer on medium flame for about 10 - 15 minutes.

Ela appam ready. Bite gently into the appam - you can enjoy the flavour of  banana and the banana leaf:)


You may also note - 
  • You may replace jaggery with sugar.
  • You can add cardamom powder to enhance the flavor.
  • You an choose to have thin appam or a little thicker ones but make sure you are generous with the filling that you place inside.


Monday, 10 August 2015

Parippu Payasam

When it is Payasam, it is kadala parippu payasam that I enjoy the most. Not just me, my sister as well. When everyone devours it hot, we love freezing it and having spoonfuls directly from the fridge:)

Our dear akka, back home never misses an opportunity to make her special payasam. She ensures that she makes a huge quantity of it when my sister and I are back home. Only once do we eat it hot and the rest is frozen payasam. If it is payasam at home, our mom is sure to find a lot of used tablespoons lying around in her kitchen from our occasional sneaks into the kitchen for the payasam.
Uhh!! Getting a little too nostalgic, am I!


So here is your recipe -

Ingredients

Kadala parippu/ Bengal gram dal - 50 gm
Raw Rice - 50 gm soaked in water
Jaggery - 250 gm
Sago seeds/chowwary/ Sabudana - 50 gm
Coconut - 2 cups (take the milk) + 2 tbsp
Cardamom powder - 1/2 tsp
Ghee


Soak the rice in water for half an hour and wet grind it along with 2 tbsp of coconut.

Fry the sago seeds in ghee till it splutters and soak in water for 15 minutes.

Soak the jaggery in a cup of water.

Cook the dal in the cooker. Do not overcook it , it should still be a little hard. Add the soaked jaggery along with the water. Once it boils, add the sago seeds and let it cook.

When the sago seeds are transparent, add the ground rice and coconut. Keep stirring and ensure that the flame is low.

Add the coconut milk and once it boils, add the cardamom powder.

You can add cashew nuts and raisins fried in ghee though I prefer to have them without either.

So that is the third recipe on the leaf. Hope you all enjoy this:)


You may also note -
  • Keep stirring the payasam once you add the rice and coconut lest it stick to the vessel and burns.


Wednesday, 5 August 2015

Pineapple Pachadi (Mathura Curry)

The recipe of pineapple pachadi sent by my friend - Vani, who has also been a guinea pig for my cooking experiments before marriage:) The bubbly and talkative girl shares my love for cooking as well.
Here goes her recipe and what she has to say about it -
Pachadi is a traditional kerala dish usually served as a side dish for meals. Pineapple pachadi is quick to make and delicious to eat. Alternatively, beetroot, cucumber and carrots are also used to make pachadi. This dish is a awesome combo of flavours.If you love the combination of sweet and sourness, you should definitely give this recipe a shot.
Ingredients
  1. Pineapple chopped-1 cup
  2. Green chilly-2-3 (You can alter the spice quotient by going easy on the chillies)
  3. Turmeric-1/4 tbsp
  4. Curd-1/4 cup +(2-3)tsp
  5. Salt -As required
To grind:
Grated coconut - 1/2 cup
Cumin seeds - 1 tsp
Green Chilly - 2 to 3
    For Seasoning:
    Oil - 2 tsp
    Mustard Seeds - 3/4 tsp
    Red Chilly - 2 tsp
    Curry Leaves
      Method
      Skin the pineapple and chop into small pieces. Cook the pineapple adding slit chilly, turmeric ,salt and water in a covered vessel(add very less water as water tends to ooze out from the pineapple). Cook until the pineapple becomes soft.
      Grind together coconut,cumin seeds,green chilly and 1 to 2 tsp of cooked pineapple into a fine paste. Add the ground coconut paste and cook till the raw smell of the coconut goes and the water evaporates. Add the whisked curd and mix well and switch off the flame.
      Do not boil after adding curd. Let mustard seeds splutter in hot coconut oil. When it splutters, add red chilly and curry leaves and pour it over the pachadi.
      Serve it along with rice.