Showing posts with label Xmas - Glows. Show all posts

Tuesday, 13 February 2018

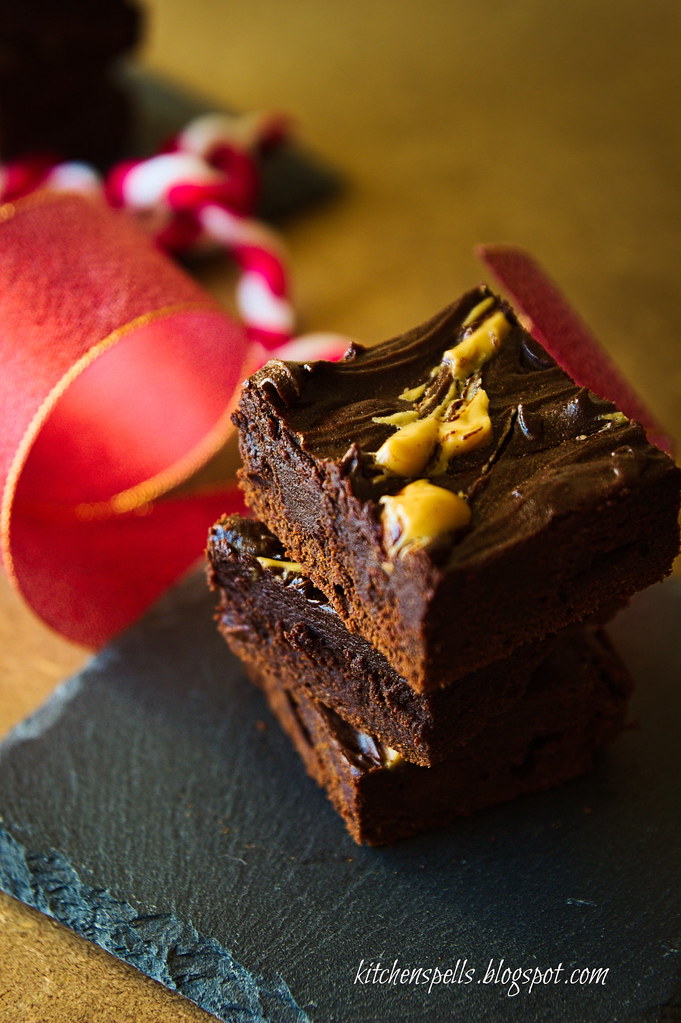
Peanut Butter Swirl Brownie

Love is all around. You just need to open your eyes and your minds to figure it. Universities and political parties boycotting Valentines Day has become the norm of this month year after year in India - just because how misunderstood the whole concept has become. Your perfect Valentine is just about anyone you Love and want to share your time with. Then again - you could have so many valentines too. Love is not limited to this time of the year. It is just a reminder that Love exists in this day of hatred and unrest. And if life turmoils have made you fail in expressing love, this is the day to re-kindle it. Call up your loved ones - express your gratitude and love because you are blessed as can be. To love and to be loved is the greatest gift mankind ever has.

'Love is patient, love is kind. It does not envy, it does not boast, it is not proud.  
It does not dishonor others, it is not self-seeking, it is not easily angered, it keeps no record of wrongs. 
Love does not delight in evil but rejoices with the truth.  
It always protects, always trusts, always hopes, always perseveres.
Love never fails.'

The above quote from the Bible sums it all up.

My list of Valentines continue to keep growing from a family I am blessed to have to all my friends who have been there for me - I love you all:)

Happy Valentines Day!

kitchenspells.blogspot.com

To make the day even more special, I have a dessert for you. Because Chocolate somehow seems to be synonymous with love, here is the recipe for Peanut Butter Swirl Brownie.

kitchenspells.blogspot.com


Ingredients

  1. All Purpose Flour – ½ cup
  2. Cocoa Powder – ½ cup
  3. Vegetable Oil – ½ cup
  4. Brown Sugar – 2/3 cup packed
  5. Egg – 2 no.s
  6. Vanilla Essence – 1 tsp
  7. Salt – 1 pinch
  8. Chocolate chips – 2 to 3 tbsp
  9. Peanut Butter – 3 tbsp
Method

  • Pre-heat the oven at 180 degree centigrade for 15 minutes and grease an 8 inch pan
  • Sieve together the dry ingredients
  • Pour oil into a bowl and beat in the sugar
  • Whisk in the eggs along with vanilla essence
  • Add the dry ingredients and fold in well. Tip in the chocolate chips and fold into the batter.
  • Transfer this to the baking pan.
  • Microwave the peanut butter for 30 seconds and drop in diagonally in dots. Using a tooth pick/skewer/fork, draw along the peanut butter creating swirl like patterns
  • Bake at 180 degree centigrade for 20 to 25 minutes

Saturday, 23 December 2017

Apple French Toast


This Christmas season has been a busy one. Lots of baking , mall hopping to see the Christmas decor, karaoke singing of Christmas carols to watching Christmas movies - we have done it all. With my sister in town to celebrate Christmas with us we have had quite a spike in our December activities.So while I sit down to relax before beginning the Christmas eve preparations, thought of sharing a quick recipe for your Christmas breakfast table.

Apple french toast is simply the addition of Green apples to your normal french toast and getting it baked. Scroll below to the recipe!!

Meanwhile, Have a holly jolly Christmas this year!!

A Joyous Christmas to all!


kitchenspells.blogspot.com


kitchenspells.blogspot.com

Ingredients
  1. Green Apple – 1 big finely sliced
  2. Butter – 2 to 3 tbsp
  3. White bread – 10 pieces
  4. Milk – 400 ml
  5. Egg – 2 large
  6. Sugar – 2 to 3 tbsp
  7. Salt – ¼ tsp
  8. Cinnamon  powder – ¼ tsp

Method
  • Pre-heat the oven at 180 degree centigrade for 15 minutes
  • Heat butter in a pan. Layer apples in the pan and cook until tender.
  • Cut the bread into smaller pieces.
  • Break open the eggs into a bowl. Whisk well and add milk, sugar, cinnamon powder and salt. Combine well.
  • Layer the bottom of a baking pan with the cooked apple.
  • Dip the bread pieces in the egg mix and layer this on top of the apples. Alternatively, layer the top with bread slices and pour the egg mix  on the top till the bread is soaked in the milk.
  • Bake at 180 degree centigrade for 30 minutes to 40 minutes or until done.

Friday, 15 December 2017

Cranberry Cobbler Dump Cake

Christmas waves a magic wand over this world, 
and behold, 
everything is softer and more beautiful. 
                        
                                     -Norman Vincent Peale


Dump it all together - there you have a dessert on your table!
Cranberry sauce, topped with cake mix and butter drizzled on top - that is the name of the dish deconstructed for you!
This is my first guest post and I am happy I got to do it with thebigsweettooth . Rafeeda of The Big Sweet Tooth is one of first bloggers I got introduced to through blogging. Her blog is a repository of recipes - a go to website for all your recipe needs. I am so glad I could add to her repository. Head over to her blog to check out my recipe for Cranberry Cobbler Dump Cake.

Wednesday, 6 December 2017

Kerala Mutton Stew

Christmas is a time that brings back so many memories. Some are funny as can be!
Good food comes with any celebration and Good food comes after so many failed attempts too! Christmas is no less.

Our first Christmas together was within a month of moving to Dubai. The cooking range oven and the griller were totally new to me. All that Shibin wanted for Christmas was 'Karangunna Chicken' - loosely translated rotating chicken. Don't whack your brains! He only meant to have those rotisserie grilled chicken :) I had my chicken marinated and for reason best known to no one I decided to place the marinated chicken in the freezer! We went out shopping got back a little late - just in time for dinner which was till in the freezer. I had no time to defrost. I placed it in the oven to melt the stubborn ice. After a while onto the rotisserie. The chicken was big and the marinade was all dripping down which is when I realised that I needed a dripping pan too. After all the trials , we still had an uncooked chicken two hours later and a messy oven. Then we did what we could do best. Cut the chicken and pan fried them. That is how we ended up eating our Christmas dinner at 12 am! Boy, I am glad we did not have any guests.

kitchenspells.blogspot.com


Moving onto the recipe. Whenever I hear mutton stew I cannot help but suppress a smile. Tell the same to my mother - she will have her volley of justifications. You will know why soon:) We were never very fond of mutton, so mutton was almost never bought at home. Once I happened to taste mutton stew with appam at a friends place for a wedding. I came home with a demand that it be mutton stew for Christmas morning instead of the usual chicken stew. Pappa bought mutton and Mamma set out to make it. The stew turned out fine but it tasted a wee bit different and had a sour taste. We went on to eat a stomach full. On her hunt for the curd she kept in glass mug to marinate the chicken for biriyani  (our Christmas lunch) did my mom realise that she had poured the curd into the stew instead of coconut milk that was in a similar cup! Nevertheless she says the stew turned out good and this how new things are discovered:) She is not going to spare me for this!

kitchenspells.blogspot.com

Here we go - 

Ingredients

  1. Mutton  – 500 gms
  2. Potato – 2 medium sliced
  3. Onion – 1 big thickly cut lengthwise 
  4. Green Chilly – 3-4 slit
  5. Ginger – 1 tbsp finely chopped
  6. Cardamom – 3 to 4
  7. Cinnamon sticks – 2 sticks of 1 inch
  8. Cloves – 3 to 4
  9. Thin coconut milk – 2 cups
  10. Thick coconut milk – ½ cup
  11. Salt as needed
  12. Water as needed
  13. Coconut oil

For Tempering

  1. Coconut oil – 2 tbsp
  2. Curry leaf – 2 sprigs
  3. Onion – 1 small sliced in cubes
  4. Peppercorns – 3 to 4

Method


  • Heat oil in a thick bottom pan. Add the whole spices and fry until aromatic.
  • Next, add onions, ginger and green chilly. Saute until the ginger is cooked.
  • Add mutton pieces and cook until the mutton is almost done. Pressure cook if need be.
  • Add the potatoes and adjust salt.
  • Add thin coconut milk and cook it covered until the mutton is done.
  • Add thick milk and switch off the flame as soon as the stew begins to boil.
  • For tempering, crush onion and pepper in a mortar and pestle.
  • Heat oil in a pan, add the crushed onion and pepper along with curry leaves. Saute till done.
  • Temper the stew with this mix. Keep it covered for a while.
  • Serve hot with appam!


Tuesday, 28 November 2017

Lovlolikka Wine ||Cooking with Family and Friends - #5||

Does the word Lovlolikka ring a bell? I am sure atleast a few malayalees have heard of those red cherries that grow abundantly in their backyard and that grand moms fondly fed you in pickles. Lovlolikka is mildly sour, tangy with a tinge of sweetness and may not be as popular for eating as is when compared to the pickles and jams that are dished out from these cherries.

I did a hunt for the English name of this cherry and google threw up names like Indian sour cherry and Indian coffee plum. To keep things simple let's call it cherry:) My mom in law has a lot of these cherries peeping into her backyard from the neighbor's garden. The neighbors have graciously offered her all the cherries that grow on the branches hovering in her yard and trust me they are a basketful. So that is how Lovlolikka wine came into being for us. She did not use yeast for fermentation but the wine came just as good with a lovely color.

Hardly a month for Christmas and if you start now, I bet your wine would be ready just in time for Santa!

So here is the 5th recipe in the series of Cooking with Family. This time again with mom-in-law.


kitchenspells.blogspot.com

kitchenspells.blogspot.com


Ingredients

  1. Lovlolikka/Indian sour cherry - 1 kg
  2. Sugar - 300 gms
  3. Cloves - 5 to 6
  4. Cinnamon stick - 2 pieces of 1 inch
  5. Water - as needed
Method
  • Wash the berries in water to remove any dirt and pat dry them.
  • Dry a big glass jar and add the berries into the jar.
  • Add the sugar along with the cloves and cinnamon sticks.
  • Pour warm water till the level of the berries in the jar.
  • Using a wooden spatula give it a good stir. Cover and keep in a dark and dry place for a week.
  • Stir again on the 5th day and 10th day by when the berries would have grown softer. Crush the berries using the spatula in the process.
  • Leave it covered and untouched for next 10 days.
  • On the 21st day, using a sieve filter out the liquid from the pulp. Store the wine in glass bottles until ready to consume.
  • Hurry up, if you start now your wine will be ready by Christmas.
You may also note 
  1. Sweetness can be increased or decreased as you like.
  2. Most of the recipes call for addition of yeast but it works fine without it as well.
  3. You may try using other berries/ fruits in the same recipe.

Monday, 29 May 2017

Chocolate Cherry Pudding

There are days when my mind wanders to my home country and my desire to go back there gets stronger. I am sure these thoughts resonate with atleast a few of the expats. Sometimes I busy myself with some work to shut away these thoughts and other days I whine and whine. After some whining, I turn to my laptop to cheer me up. The one show that makes all the worry lines cease to exist is FRIENDS. I just can't have enough of it. I have watched season by season and now go on to youtube to catch some scenes from it. All the characters have become so etched in me that I feel they live around me. Like any other Friends fan, I would love to see that Reunion happening till then I can continue to watch it in a loop. 

Cooking does cheer me up but imagine cooking and watching Friends at the same time :P I do it often these days.( I hate it when I have to turn on the blender, the noise is such a distraction:P) From Monica's jam to Ross' Fajita , Rachel's English Truffle to Joey's sandwich, Phoebe's chocolate chip cookies to Chandler's cheesecake - food becomes an integral part of Friends. Those who have watched Friends can sure co-relate.  Cooking these days is more fun that it used to be ( Hope my Dad doesn't read this - he was very particular that we do one task at a time and not multi task but I can't just help it!)
kitchenspells.blogspot.com

Over to my recipe, a rarity on my blog - a dessert. I have adapted the recipe from Spinneys magazine - when I read this recipe two months back I knew I simply had to do it. I went hunting for cherries and came back empty handed - Cherries were available nowhere. The recipe lay forgotten until few days back when I saw cherries at a local supermarket - then I knew I had to make this desert. And I am quite pleased with the result:)

There you are - 

Ingredients
  1. Butter - 150 gm
  2. Semi sweet chocolate - 200 gm
  3. Powdered sugar - ½ cup
  4. All purpose flour - ¼ cup
  5. Cherry - 150 to 200 gm
  6. Egg - 2 no.s
Method
  • Preheat the oven to 200 degree centigrade.
  • Melt the chocolate and butter in a bowl placed on top of simmering water. Mix using a spatula and combine well. Let it cool.
  • Beat the egg and fold in the powdered sugar and flour.
  • Add the chocolate mix to this along with pitted cherries.
  • Transfer the mixture into a baking tray and let it bake for 20 to 25 minutes.
  • Serve it warm along with a dollop of vanilla ice cream.
kitchenspells.blogspot.com

Sunday, 16 April 2017

Pineapple Chiffon Cake with Spiced Pineapples

Happy Easter !!

I did want this post to be done a couple of days early but Easter seems a good enough reason for this cake recipe to go through. I completed two years of blogging this month and if someone told me two years back that this would happen, I would never believe it! Now that I am here, I would just love to say THANK YOU to everyone. 

While I try out my mamma's recipes, she tries some of mine too! My Pappa  religiously clicks away pictures of recipes from newspapers and magazines for me and my sister believes that my blog will make it big some day! My cousins - Vinitha and Neenu - one who diligently gives me ideas and other who meticulously reads them and  questions. My mother in law is the first one to share my recipes on facebook and my bro - in- law and co sister who always read my write ups and provide their comments. My love to all my friends, fellow bloggers and friends who are the reason why I am still in this blogging space and enjoy being here. And to Shibin, well this is our blog so technically it is Thank you from both of us to all of you!

On to my recipe - I wanted to make a pineapple cake and some research led me to this pineapple chiffon cake. So, the next question - what exactly is a chiffon cake? Chiffon cake is simply made with vegetable oil and fluffed up by beating the egg white to form peaks - sort of a cross between a sponge cake and oil cake. With a little bit of tweaking and addition of spiced pineapples - I had my pineapple chiffon cake with spiced pineapples.

kitchenspells.blogspot.com

Ingredients

For the cake -
  1. All purpose flour - 2 cups
  2. Egg - 4 
  3. Sugar - 1 cup + 4 tbsp
  4. Vegetable oil - 1/2 cup
  5. Canned pineapple slices with syrup - 450 gms ( about 10 pineapple slices)
  6. Vanilla essence - 1/2 tsp + 1/4 tsp
  7. Baking powder - 1/2 tsp
  8. Star anise - 2
  9. Cinnamon powder - 1/2 tsp
  10. Whipping cream - 2 cups
  11. Powdered sugar - 3 tbsp
  12. Water - 4 tbsp
  13. Ghee/ Clarified butter - 1 tbsp
  14. Salt - 1 pinch
Method

Spiced caramelised pineapples
  • Heat a frying pan and add 4 tbsp of sugar to it. Let it melt, brown and caramelise. Add 4 tbsp of water to it - initially it would form lumps but let it boil and it would form a thick syrup. 
  • Reduce the flame and add sliced pineapple to this along with the star anise and cinnamon powder.  Let it caramelise into a beautiful golden yellow. Flip and move around so that it caramelises uniformly on medium flame. Once done, add a tablespoon of ghee and let it caramelise for another 2 minutes. Switch off and let it cool.
Chiffon cake
  • Separate the egg yolks and the egg whites. Beat the egg white stiff.
  • Sieve together the flour, baking powder, salt and set aside.
  • Bring together the wet ingredients - vegetable oil, egg yolks, 1/2 a cup of pineapple syrup from the canned pineapples and vanilla essence. Add the sugar and using a spatula combine them well.
  • Add the flour in batches incorporating them well into the wet ingredients.
  • Finally, add the beaten egg whites and fold them in together.
  • Pre-heat the oven to 200 degree centigrade and bake the cake for 35 to 45 minutes or till a tooth pick inserted comes out clean.
  • Transfer to a cooling tray and let it cool.
Whipping Cream
  • Keep a bowl and whisk in the fridge for 20 minutes.
  • Add the whipping cream, 1/4 tsp essence and vanilla essence into the bowl and whisk on high speed for 6 to 8 minutes till it forms peak stiffs.
  • Refrigerate it until it is time to use.
Combining and decorating
  • Slice the cake into two layers. Level the cake by slicing off any uneven surface. 
  • Prick the cake randomly with a pin and drizzle 1/2 a cup of pineapple syrup for making the layers moist.
  • For the two layer cake, use the layer sliced off from the top as the bottom layer while frosting and keep the bottom of the cake inverted at the top for the top layer. This is done to get a level surface on top.
  • Keep one layer on a rotating cake stand. Slather a generous amount of whipped cream on this layer. Chop five of the spiced pineapple slices and spread this on the whipped cream. Spread a little bit more of whipping cream to hold it together.
  • Keep the bottom of the cake inverted on the top of this. Press it gently.
  • Slather whipping cream on the top of the cake and also on the sides. Decorate the top of the cake with spiced pineapples. Pipe designs on the top for the final touch!
Things to note - 
  1. Let the cake cool before starting the frosting.
  2.  If you are not into decorating - you could simply have the layers slathered with whipping cream and topped with pineapple leaving the edges bare and no piping as well.
  3. If you are using whipping cream for the first time - do not panic! You will find that it has the consistency of nothing but cream first and as you beat it it thickens up and forms peaks. Over beating may result in curdling up.

Sunday, 11 December 2016

Carrot Halwa Cheesecake - No Bake

The long weekend has heralded a hopefully long winter in Dubai. The winds are chilly and my hands are invariably reaching out to the woolens. The sky is clear and occasional clouds pass by as I look up and pray that at least one would sprinkle showers as they go by. I have not been that lucky yet! It is that time of the year when we reach out to those soothing hot drinks and soups. Yet the crazy part in each of us would want to grab hold of an ice cream or something chilled. ( although the angel in your head would speak of possibilities of falling sick - the devil in you doesn't care)

The call for making a cheesecake has been there since the last mango season. The season passed by and no cheesecake was made. While discussing the menu for Christmas, Shibin was quick to suggest a cheesecake and since mango is not in season now, I was left pondering on the flavor. I was quickly taken back to one of the episodes of Dhe Chef - a Malayalam channel cooking reality show where one of the contestants happened to make a carrot halwa cheese cake.  So there it was done!!

The cream cheese I have used is homemade - I picked up the recipe from the blog - Sharmispassion . I increased the quantity of lime juice added to 3 tbsp as against the 1.5 mentioned in the blog to get the desired consistency. Why do you need to buy cream cheese, if you can make it at home!! It is cheaper and not so tedious. Head over to her blog, if you want to give it a shot and below is my cheesecake recipe.


kitchenspells.blogspot.com


Ingredients

For Carrot Halwa

  1. Carrot - 1 and half cup grated
  2. Sweetened condensed milk - 100 ml
  3. White sugar - 2 tbsp
  4. Ghee - 4 tbsp
For cheesecake
  1. Digestive Biscuit - 8 -10
  2. Butter - 3 tbsp melted
  3. Cream cheese - 1 cup
  4. Thick cream - 1/3 cup
  5. Sugar -1/4 cup powdered
  6. Rose essence - 1 tsp
  7. Salt - 1 pinch
Method

Carrot Halwa
  • Heat 2 tbsp ghee in a saucepan and add the grated carrot. 
  • Add the condensed milk and combine. Let it simmer on low flame till the raw taste of the carrot goes and the milk content reduces by 80%.
  • Add sugar and remaining ghee. Stir till it combines well and the moisture content dries up.
  • Set aside to cool
Cheesecake
  • Put the digestive biscuits into a ziploc bag and crush it using a rolling pin till coarse
  • Combine this with melted ghee. Layer the bottom of 4 glasses with this mixture and press down using spoon. Let it refrigerate for 30 minutes to 1 hour.
  • Whisk the thick cream until peak is formed. Add in the cream cheese and combine well.
  • Add in the sugar, salt and the essence and combine.
  • Add about 3 tbsp of the carrot halwa to the cheese mixture and fold this in.
  • Scoop spoonfuls of the cheese mixture into the glasses. Gently tap down the glass on tea towel to level the cheese layer.
  • Refrigerate for 30 minutes to an hour.
  • Finally, top the cheesecake with carrot halwa and refrigerate for about 2 hours.
  • Serve chilled.
kitchenspells.blogspot.com

Friday, 9 December 2016

Whole Wheat Banana Chocolate Muffins

kitchenspells.blogspot.com


It has been long since I played the game of Secret Santa - I am sure most of you are familiar with this game. It is not the gifts you wrap or unwrap that gives the happiness. It is more about the suspense, the secret letters and the guessing games as to who could be your Santa. I was introduced to this game when I was in hostel where every year we religiously play  - we did have our semester exam during this time of the year but that never dampened our spirits. Nothing could possibly be a hindrance to this game when you have a whole hostel - 100 odd girls playing this game. We had a letter box where we could drop in letters addressed to our secret friend. The thrill of finding a letter addressed to you or small gifts that would mysteriously appear on your bed or a messenger getting it for you. Aah!  Shopping for the gifts weren't easy either. It was always last minute purchases and all the 100 girls end up at the same store every time. We had to dodge our secret friends in the store to get across to buy gifts for them. Aah! Those were the small joys of Christmas.

I wonder as we begin to grow older, do we stop ourselves from enjoying those tiny little things we once enjoyed. So why not this Christmas try to relive your favorite memories - age is after all just a number. May be its a game of Secret Santa or going caroling or baking - let us grow younger this Christmas!

Over to my Christmas recipe - an easy to make muffin with lesser greased utensils. All the combining is done in one bowl - so what are you waiting for - hurry over and try this

kitchenspells.blogspot.com


Ingredients
(makes 10 muffins)

  1. Ripe Banana - 1/4 cup mashed
  2. Butter - 1/4 cup melted
  3. Brown sugar - 1/4 cup
  4. Egg - 1
  5. Wheat Flour - 1 cup
  6. Baking powder - 1/2 tsp
  7. Baking soda - 1/4 tsp
  8. Cocoa powder - 1 tbsp heaped
  9. Salt 
Method
  • Pre-heat the oven to 180 degree centigrade
  • Sieve together the dry ingredients - Wheat Flour, cocoa powder, baking powder, baking soda and salt
  • Take the mashed banana in a bowl and add the brown sugar and butter
  • Break open an egg into this and add the vanilla essence and fold well to combine
  • Now incorporate the dry ingredients in batches and mix well as you go
  • Line your muffin tray with muffin cups or parchment paper and scoop out the batter into the cups.
  • Bake at 180 degree centigrade for 20 minutes or till a pin inserted comes out clean.
  • Once done move onto a cooling rack.
  • Dust a bit of powdered sugar on the top for the finale.

Saturday, 3 December 2016

Ginger Cookies

It is winter, it is Christmas and baking just happens this season! Listening to the carols, there I went baking again.  

My mind began wandering to 'Long time ago in Bethlehem',
In the 'Silent Night'
I envisioned 'Hark the herald, angels sing'.
The bright stars guiding 'We three Kings of Orient are'
Led them to the place where 'Mary's boy child Jesus Christ' lay.
 ' O Come All Ye Faithful' and spread the word.
'Go tell it on the mountain' and spread 'Joy to the world'.

It is a 'Merry Merry Merry Christmas'
And 'Santa Claus is coming to town'
'Dashing through the snow' here he is
With 'Rudolf the red nose reindeer' by his side
and 'Frosty the snowman' to welcome him
I 'Decked my halls with boughs of Holly',
and keep dreaming about a 'White Christmas'.

Looks like an overdose of carols!! Oh Never mind, like Shibin says when Christmas is over we should be tired of listening to carols and I still have 21 days more to go!

I am not a wonderful baker to be honest! I have had my disasters in the oven. There was a time I used to give up if I did not get the recipe right in the first go. Over time, I have learnt that patience has its virtues and I am ready to give several shots before I get it right. The end result has always been worth it for me!  The smell of the freshly baked goodies and the delight on the faces of my food testers:) make every effort worthwhile. I have learnt on the go that oven of different models behave differently, the type of flour that each one uses would have different levels of tolerance to moisture and so on and so forth. At the end of this recipe, I have given a few tips based on my baking experiments.

So here is my recipe - Ginger cookies

kitchenspells.blogspot.com

Ingredients

  1. All Purpose Flour - 1 and 1/2 cup
  2. Baking Soda - 1 tsp
  3. Ground dry ginger - 2 tsp
  4. Ground cinnamon - 1 tsp
  5. Ground nutmeg - 1/2 tsp
  6. Salt - 1/4 tsp
  7. Brown Sugar packed - 1/2 cup
  8. Butter - 100 gms
  9. Egg - 1 medium size
  10. Vanilla essence - 1 tsp
  11. White Sugar for rolling the cookie dough


Method
  • Combine the dry ingredients listed from 1 to 6 and sieve them well
  • Make sure your butter is at room temperature. Add the brown sugar to a bowl of butter and cream it using a electric beater or a hand whisk
  • Break open an egg into this, add the vanilla essence and combine well
  • Slowly, add small batches of the sieved ingredients, mixing with a spatula to combine
  • Once the dry ingredients have combined with the wet, dig in your hands to do a bit of kneading and bring the dough together
  • Let the dough rest for about half an hour
  • Meanwhile line your tray with baking parchment and pre-heat your oven
  • Wet your hands and pinch off small lemon sized balls from the dough. Roll it in a plate of white sugar until the ball is completed coated in sugar
  • Place this on the baking tray and leave sufficient gap between the cookies for it to expand
  • You could either bake the cookies as is or press it down with a fork and flatten it slightly
  • Bake for 15 minutes at 180 degree centigrade
  • Once done, transfer it to a cooling rack
  • This cookie goes extremely well your cup of tea. Try it to believe it!
kitchenspells.blogspot.com

You may also note - 
  • Ovens quite often behave differently depending on the brands, capacity and energy source. You may have to do several trials with your oven before you have the perfect cookies or cakes. When I started making cookies- I often used to get the underneath of it burned and the inside still uncooked. Its after quite a few experiments that I started getting the texture right. Patience always pays and the first time need not always be your best!
  • If you are using a gas oven that lights up only at the bottom, you could try placing the baking tray at the top most slot and baking it for a while longer than suggested in the recipe.
  • In case your cookie dough is a little too soft and you are finding it difficult to roll, just refrigerate the dough for a while.
  • Cookies generally seem a little under cooked when you take it out of the oven - let it cool to harden and get its color.

Sunday, 27 November 2016

Oven baked fish in indo-chinese sauce

It is never too early Christmas!

The best is always saved for the end of the year - there cannot be anything better to end a wonderful year!

I pray this season passes by slow so that I get to savor every moment of it. So while it lasts - let's get into some cooking , carols, decorating and lots of fun filled moments with family and friends.

I did happen to mention last Christmas that our love for Christmas was one thing that brought Shibin and me close. We are leaving no stone un-turned this year as well. We have put up our tree, our Christmas wreath is in making, cbn radio that plays Christmas songs throughout the year is live on my system while I write this, Christmas movies are up and running in the evenings and I am preparing my December menu!

If you are a person who enjoys this season as much as we do then hurry up - put your tree!! Listen to cbnradio - (http://www1.cbn.com/radio/christmas) if you love the carols and checkout the Hallmark Christmas movie collection on youtube. None of these are sure gonna disappoint you.

 I could go on about Christmas but I do have more recipes I hope to put up this Christmas and hence let me save my stories for later. Here is a recipe you could try out for your December menu - Oven baked fish in indo - chinese sauce.


Ingredients
  1. Fish - 1 kg
  2. Turmeric powder - 1 tsp
  3. Red chilly powder - 1 tsp 
  4. Onion - 3 large chopped
  5. Garlic- 2 tsp chopped
  6. Green chilly - 2 chopped
  7. Soya sauce - 3 tbsp
  8. Tomato sauce - 2 tbsp
  9. Water - 3 tbsp
  10. Coriander leaves - 1 bunch chopped
  11. Salt to taste
  12. Oil - 2 tbsp
Method

Clean and pat the fish slices dry. Create slit on the fish to help the flavors seep in.  
Marinate the fish in turmeric powder and salt for about half an hour.

In a bowl, stir in the tomato sauce, soya sauce with water and keep aside.

Meanwhile heat oil in a pan and add the chopped onions and garlic. Saute for 2 minutes before adding the green chilies and cook until tender. Add the chilly powder and cook the masala. Add the previously made sauce mix and switch off the flame,

The fish can either be baked in a tray or in an aluminium foil.
Pre heat the oven at 200 degree centigrade.
Line a baking tray and pour spoonful of sauce on to the tray and place the fish on top of this. Pour the remaining sauce onto the fish completely covering the fish. Bake for about 25-30 minutes or until done.

Alternatively, place your fish on an aluminium foil and bring the edges of the foil together. Add in the sauce and bring together the edges of the foil , press it together and roll it prevent the steam from escaping. Bake for about 20 minutes or until done.


You may also note - 
  1. I used 2 big Pomfrets and hence my baking time would be on higher side. You may adjust according to the fish you are using.


Saturday, 11 July 2015

Dates and Walnut Loaf

It is Ramadan season.
Festive display of dates and sweets made of dates fills the supermarkets in Dubai.

So why not something made from dates for Iftar this season.
kitchenspells.blogspot.com


This is my first attempt at making dates loaf and it was a colleague who suggested to add in the walnuts as well for the crunch.  Dates by itself is quite sweet and I wanted to make sure that the loaf does not become extra sweet by regulating the sugar content.

Again, like my most recipes it is simple and quick.
kitchenspells.blogspot.com


Here you are -

Ingredients

  1. Dates - 3/4 cup de-seeded and chopped
  2. Milk - 3/4 cup
  3. All purpose flour - 1 and 1/2 cup
  4. Sugar - 4 tbsp
  5. Egg - 2 no.s
  6. Cinnamon powder - 1 tsp
  7. Baking powder - 1 tsp
  8. Salt - 1/2 tsp
  9. Vanilla essence - 1 tsp
  10. Walnuts - 1/2 cup
  11. Vegetable Oil - 1/2 cup 
  12. Honey - 2 tbsp

Method

Heat the milk with the chopped dates on medium flame for 5 minutes and let it rest.

Sieve together the flour, baking powder,cinnamon powder, salt and keep aside.

Break open the eggs and whisk well. Add sugar and vanilla essence and mix it well.

Fold the dry ingredients into this and add dates, milk and oil. Whisk together the ingredients.

Pre- heat the oven for 10 minutes at 180 degree and grease a loaf tin.  Add  crushed walnuts into the loaf mix and just swirl around with a spoon. 

Transfer the mix into the loaf tin and spread some walnuts on top.

Place the tin in oven and heat at 180 degree for around 30 - 40 minutes. After 25 minutes, take out the loaf tray and glaze the top of the loaf with honey using a brush and place it back inside.

Cook till a pin inserted comes out clean. Transfer it to another surface for cooling. Serve with topping of your choice.
kitchenspells.blogspot.com


You may also note - 
  1. You can increase either the dates quantity or sugar to make it sweeter. We chose to make it less sweeter.


Saturday, 20 June 2015

Crepes - Brunch the English way

The English version of our very own Indian Dosa is what I would want to call it -Crepes.
A good way to begin your day, an easy brunch for those lazy days, an evening snack or even a relishing dinner - the way you like with the filling of your choice. 
We chose to have it as our Saturday Brunch!

The first time I heard of crepes..hmm..Of course from my husband!!
Heard, may the wrong word. He 'made' it for me on our second Valentines day together!!

What fascinates me about crepes is the choice of filling you possibly can have. While we chose Jam, you may opt for anything from Honey to Nutella if you want it sweet. As a savory dish, you can choose any fillings of veggies or meat and roll it up. Also, this could turn into a perfect snack for your kids tiffin box:) Get innovative with crepes - roll it up and slice it or stack it and serve with fresh fruits and glimmer of honey. I am sure kids and adults will enjoy every bite of it.


So here we go - 

kitchenspells.blogspot.com


Ingredients
  1. Self raising flour/maida - 1 cup
  2. Salt - 1 tsp
  3. Sugar - 3 tsp ( you can increase the quantity if you want it sweeter)
  4. Eggs - 2
  5. Vanilla essence - 3 drops
  6. Milk - 1 1/2 cups
  7. Butter - 2 tbsp - melted

Method

Sift the flour to prevent formation of lumps. Add sugar and salt and keep aside.

Break the eggs into a cup and whisk it well using a hand blender. To this, add vanilla essence and milk. Make sure your eggs and milk are at room temperature before the preparation. Whisk the wet ingredients together.

Pour the wet ingredients into the dry ingredients slowly, whisking it constantly. Make sure that no lumps are formed. To be on safer side , you can strain the batter once you are done whisking..

Finally add the melted butter and mix the batter well.

Meanwhile heat a pan and brush it with butter. Take the pan off the heat, pour a ladle full of batter onto the center of the pan and rotate the pan for the batter to spread and create perfect circle. The crepes have to be thin and uniformly spread. Let it cook on medium flame for about a minute and a half and then flip it over. Once flipped over just cook it for half a minute and transfer it to a plate.

We had a lovely brunch of crepes with jam and a serving of pan fried plantains.
Fresh home made jam goes best - here is the recipe - http://kitchenspells.blogspot.ae/2015/05/strawberry-apple-jam.html.

Go truly the English way with a serving of scrambled eggs or sausages and coffee.

This is definitely a must try recipe! Coz it is simple and yummy!

kitchenspells.blogspot.com


Monday, 4 May 2015

Swiss Roll/Jam Roll

Swiss Roll/Jam roll

Jam roll always reminds me of the summer vacations while we were still at school -a long two month hiatus in Kerala along with my cousins. There was a routine established for the four of us and the most important of it all being the 5 pm wait on our balcony for my aunt to get back from work - for pouncing on the goodies in her bag. She never failed us. 

Jam Roll was my favorite, it always intrigued me. Sometimes I would just bite into it hungrily and sometimes I took the time to unroll it lick away the delicious mixed fruit jam and then dig on the cake. The 'little me' never would have imagined that she would actually be making jam roll one day.

The idea of trying out something like this popped up when we brought orange marmalade. I was tasting it for the very first time and it did not fascinate me much. I had a bottle full of it and did not absolutely want it to rot away. That is when my hubby told me why not try a Swiss roll? I was clueless how this was done. Yet, I decided to try out on a weekend as we were expecting a few guests. I baked the cake for the roll but it was adamant and refused to roll, cracking up when I tried to roll it.  I could not let it go waste. So I decided to sandwich the marmalade between two slices of cake cut into circles and dust it with powdered sugar. It tasted good but the cake had turned out a little harder making the rolling difficult. I decided to research on this a bit more and this time it turned out the way just I had wanted it to.
Swiss Roll/Jam Roll


Honestly, making a jam roll is not complicated as it looks. Just a little bit of patience and there you are.


Ingredients

For the sponge cake-

Self raising flour/Maida - 1 cup
Powdered sugar - 1 cup (3/4 goes into the cake and the rest for dusting)
Eggs - 4 separated
Vegetable oil or butter - 2 tbsp
Vanilla essence - 1 tsp
Baking powder - 1/2 tsp

Marmalade/ Jam/ Cream - flavor of your choice


Preparation
  1. Sift the flour and baking sugar and keep aside.
  2. Separate the egg yolk and white. Whisk the egg white along with a little sugar using a hand blender or electric blender for 7-8 minutes so that it becomes thick.
  3. Add the vanilla essence into the egg yolk and mix it well. 
  4. Into this, add 3/4 cup of the powdered sugar and the egg white. Fold in gently using a spoon or spatula in order to avoid air bubbles.
  5.  Add the sifter flour, fold in the mixture well and finish off with the vegetable oil.
  6. The cake mix is now ready to go into your oven.
  7. Make sure that you pre - heat your oven at 180 degree for 15 minutes. Grease a square baking tray, in case you do not have that, you can use your roasting tray as well. Pour the mix into this and make sure it is evenly spread across.
  8. Place in the oven for 10 - 15 minutes. Keep checking to avoid overcooking or browning of the cake.  
  9. Sponge cake rolled in parchment paper
    Roll the sponge cake while hot along with the parchment paper
    Remove it from the oven once done and invert on top of a parchment paper which has been sprinkled with powdered sugar.( In case, the cake is too thick and you want your rolls to be thinner, you may just slice through the center)             Sprinkling of sugar is important else your cake may stick to the paper.
  10. While still hot, roll the cake along with the parchment paper till the fag end. Tie up the ends to retain the shape and leave it to cool.

11. Once it has cooled down, unroll it spread the jam or marmalade evenly over the entire length and a little thinner towards the sides as the excess may pop out as we roll. Dust the roll with powdered sugar.Roll it back and cut out the rolls into thickness of your choice

Jam Roll
Cut off the ends of the roll where the excess jam has spilled over
Your Jam Roll is ready to be served. Once a while instead of just making a sponge cake, you can layer it with jam and roll it - impressing everyone around you.
Jam Roll


Wednesday, 22 April 2015

Carrot Cake

It all started for Christmas in 2012 when a colleague gave me a cake recipe. The very same day I purchased all the ingredients and made my very first cake. I did not have an oven and resorted to baking the cake in a cooker. ( you need to be careful, you don't use water and gasket and the cooker gets mighty hot). Since then, I have tried a lot of cakes in the cooker. It did turn out tasty but often a little too hard with the bottom and the edges burnt,

I have also tried the traditional method of baking where the cake tray is inserted into a vessel with hot sand generally kept over the traditional chullah. The vessel is then covered with a lid with burning coal on top as well so that the cake gets evenly baked. I was too scared to handle that and it was my mother who was a master in that and me just a by stander.

It was only post marriage in 2014 that I learnt to use an oven to bake cakes. I had no idea about the right temperature nor the timings .After a few burnt and also sometimes under cooked cakes, I do have an approximate idea now.

Initially cake baking was a tedious and tasking job for me - sometimes the cake does not rise, I have too many bubbles in the cake, I have the nuts and fruits settling at the bottom and the top of the cake is not cooked enough where as the bottom is burnt. My husband is a wonderful 'analyser' and I would say 'get it right person'. He often googled up and found solutions to most of my problems.

I have not yet mastered the art of baking and I hope to some day. As of now, I am still learning and correcting as I go along.

Your cakes can turn out right if you learn to love your ingredients and handle them as instructed in the recipes you find across in different sites. For instance - make sure all your ingredients are at room temperature and stick to the measurements provided. Once you have a knack of it, you may try variations.

So let me move on to my carrot cake.

A wonderful evening with Tea, Cake and a Perfect book.


Carrot Cake


Ingredients

All purpose flour/Maida - 2 cups
Powdered sugar - 1 cup ( you may raise it to 1 and a half cup - neither of us have sweet tooth so I generally add lesser sugar)
Egg - 2( if the egg is really small you may add 3)
Buttermilk - 1/2 cup
Oil - 1/4 cup
Cinnamon powder - 2 tsp
Baking powder - 1 tsp
Vanilla extract - 1 tsp
Carrot - 2 grated
Raisins
Cashew nuts
Salt

Preparation


    Carrot Cake
  1. Mix together the dry ingredients in a bowl - flour, powdered sugar, baking powder, salt and cinnamon powder. Sieve it in order to prevent formation of lumps.
  2. Beat the eggs well along with vanilla essence and add in the buttermilk and oil. Combine it well.
  3. Slowly add the dry ingredients to the wet ingredients mixing it well as you add. Do not beat it further, just enough for the ingredients to mix else it may lead to formation of air bubbles.
  4. Add the grated carrot into the cake mix and fold in gently.
  5. Roll in the cashews and raisins in a little flour  and keep aside.
  6. Preheat your oven at 180 degrees for about 10-15 minutes. 
  7. Grease your cake tray with a little oil and dust flour on top of it. Turn the tray upside down and pat away the excess flour.
  8.  Pour your cake mix into the pan and add the nuts and raisins evenly . Just run your spoon across once and cover the cake tray with an aluminium foil. Gently fold in the sides of the foil- no free ends should be sticking out touching the corners of your oven. Covering your cake with foil allows the top of the cake to be uniformly heated and baked.
  9. Place your tray in the oven at temperature of 180 degree. Check your cake after 20 minutes. Insert a tooth pick or pin and if it comes out clean your cake is ready. Else keep it for 10-15 more minutes. The cooking time may vary depending on the tray you use and the consistency of your mixture. The ideal time would be somewhere between 20 to 35 minutes. My carrot cake took about 25 minutes.
  10. Once baked , remove the cake from the cake and let it cool before your slice and have your first bite.
Enjoy every bite of your cake with steaming tea!!