Showing posts with label Snacks. Show all posts

Friday, 6 October 2017

Fish Cutlet

Time flies by in Dubai - yet another winter is peaking over the horizon. I love winters. If only I could do away with the occasional flu that tends to interrupt the weekend outing plans. We are done with the first flu of the winter which I would like to call the 'change of season flu' that has so become ingrained in our lives for the past three years. Looking forward for a blissful few months that includes a vacation home and not to forget the impending festival season.


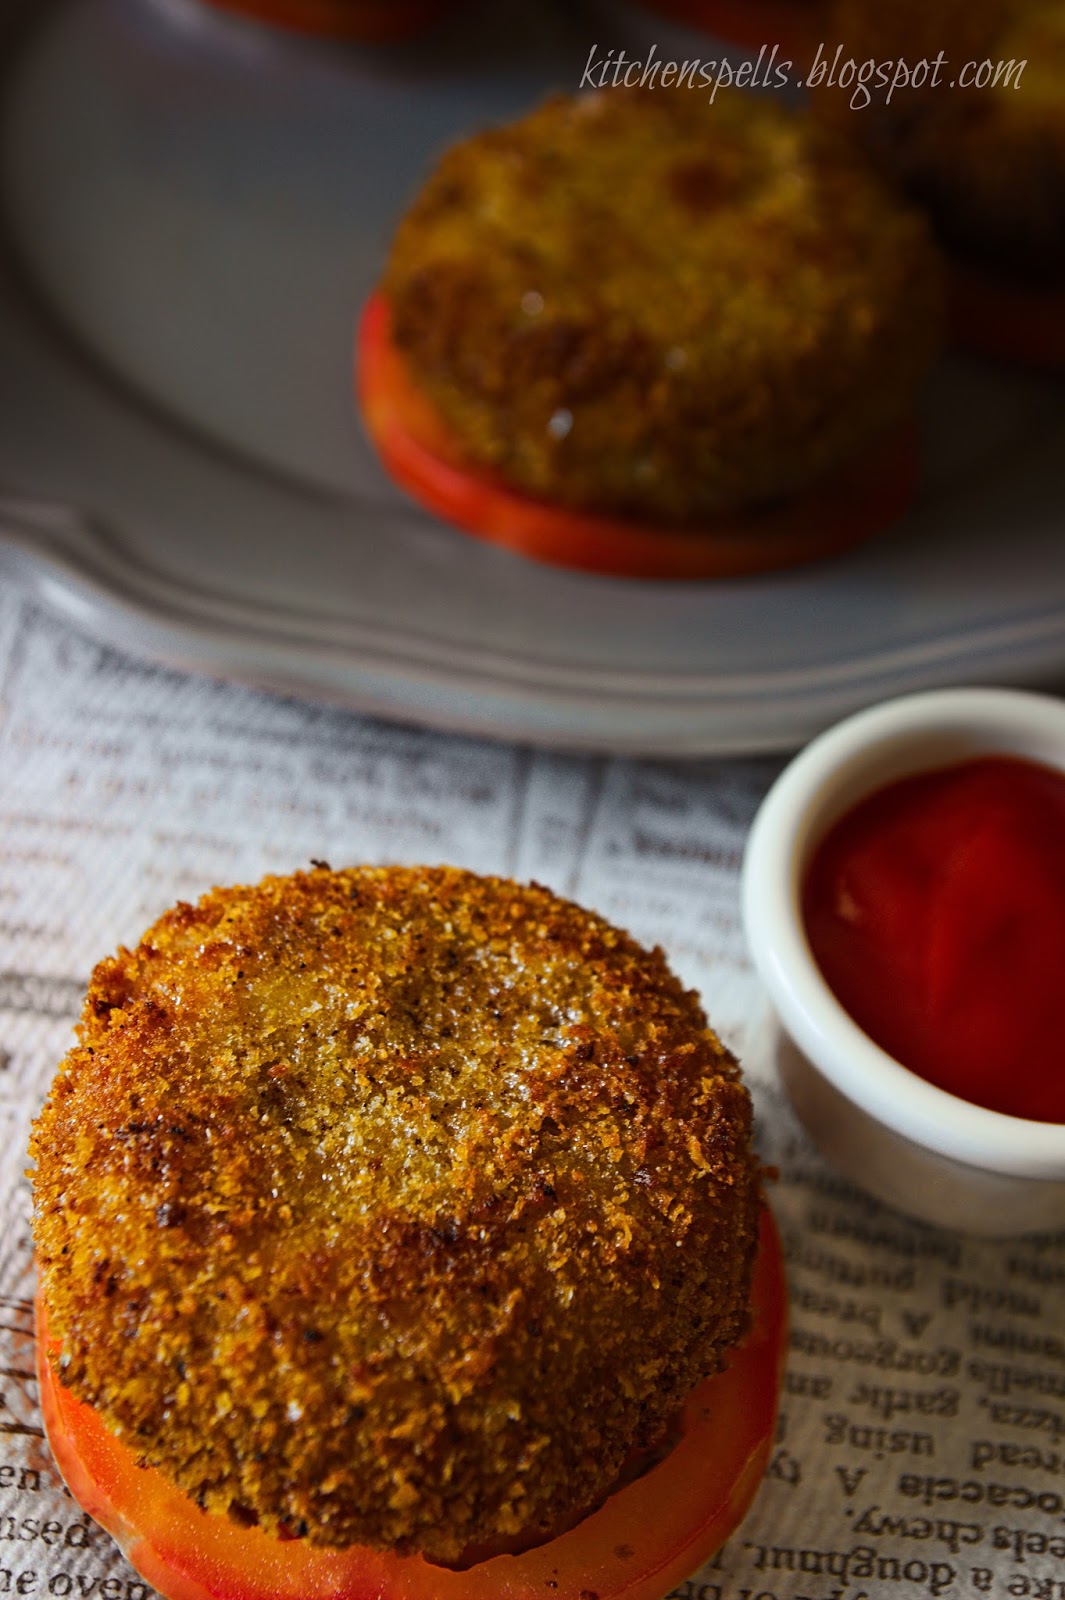
On that note, we head over to the new recipe on the blog - Fish cutlet. The type of fish you choose is absolutely your choice - the lesser the bones the easier the task of mincing it. Cutlets can make your weekday dinner cooking a little easier. Just prep a batch over the weekend and freeze it!

Here goes the recipe - 


kitchenspells.blogspot.com


Ingredients
  1. Fish - 1 kg
  2. Potato - 2 medium sized
  3. Ginger - 1 tbsp grated
  4. Green chilli - 4 to 5 finely chopped
  5. Onion - 2 medium finely chopped
  6. Turmeric powder - 1/2 tsp
  7. Pepper powder - 1 tbsp + 1 tsp
  8. Egg - 2 beaten
  9. Bread crumbs
  10. Salt to taste
  11. Oil for frying
Method
  • Clean and pat dry the dry the fish. Marinate the fish in turmeric powder, salt and pepper (1 tbsp). Steam the fish until cooked through.
  • Let the fish cool and separate the flesh from the fish bones. Using fingers crumble it to smaller flakes/ mince them and set aside.
  • Boil potatoes in water. Skin them and mash them coarsely.
  • In a pan, heat oil and add the onions. Let it sweat before adding in the ginger and green chilly. Saute till the ginger is cooked well.Add in required salt and pepper powder.
  • Add the minced fish to this masala and give it a good mix. Turn off the flame and add the mashed potato. Mix them well.
  • When it is warm enough to handle. Roll them into desired shape.
  • Freeze them for about half an hour.
  • Dip them in beaten egg and roll in the bread crumbs so that it is coated well.
  • Freeze them for atleast half an hour before frying.
  • You could either deep fry the cutlets or shallow fry them until golden brown and crisp on both the sides.
You may also note - 
  • Ensure to freeze them for a while before frying, it helps the bread crumbs to stick on.
  • Ensure the oil is hot enough before dropping in the cutlets, lest they tend to separate.
  • The cutlets once rolled in bread crumbs can be frozen up to 2 weeks.

Saturday, 15 July 2017

Caramelised Banana| Banana Ghee Roast|Ethekka Nei Roast


kitchenspells.blogspot.com

If you are a malayalee, then you must be quite familiar with the Kerala Banana which is an integral part of a malayalee household. Breakfast, lunch or even snacks, if you love them, you always have a way incorporate it into your food. Raw banana is thinly sliced and fried to make the popular Kerala banana chips( yes, the very same chips you ask your malayalee friend to get when they come back from their vacation). The ripe banana is good eaten as is or if you do not like the taste there are always ways to modify it. Crisp it up by battered deep frying it, make payasam for your sadya, halwa, kaipola, pullisery, unnakkaya and a healthier option of simply boiling it or jazz it up with a little butter and sugar. If you are looking for something quick with minimal ingredients, then this is the recipe for you - a frequent dish at our place be it breakfast or evening snacks.

kitchenspells.blogspot.com

Here you go -

Ingredients

  1. Banana - 2
  2. Ghee - 2 - 4 tbsp
  3. Sugar - 1 tbsp
Method
  • Slice the bananas into three equal parts and slice them into three or four slices along the length.
  • Heat ghee in a pan and place these slices in the pan. Once the color of the banana turns a darker yellow and begins to brown slightly, flip them over and cook until done.
  • Transfer to a plate and sprinkle sugar. Serve warm with a cup of coffee.
You may also note - 
  • Use a properly ripened banana. Overripe bananas are not suitable to be used as it will not hold together and will be hard to flip over.
Other banana recipes on the blog - 

Wednesday, 22 March 2017

Crispy Sweet Corn

kitchenspells.blogspot.com

I keep saying that every dish has a story behind it and Shibin says every photograph should tell a story. So we definitely have a 'Once upon a time' in this dish and a 'happily ever after' too.

Most of us have heard of Barbeque Nation and have atleast been there once to satiate our barbeque cravings.What you probably did not know was this restaurant chain is owned by Indore based Sayyaji Hotel. I was fortunate enough to spend two days here and that is where my love affair with crispy fried sweet corn started. I have tried making this snack couple of times - but never achieved success till about two weeks back. This definitely does not meet BBQ Nation standards but still we loved it this way.
Last week, we had a family over for dinner and we spent most of the time playing carroms. The need for a quick snack at the carroms table was what reminded me of this recipe. It turned out crispy as I wanted it to and that led me to making it again the very next day for the blog. That is when Shibin suggested that we make it a snack for our evening trip to the beach and photograph it there. For him, this seemed an ideal picnic snack and where better than a trip to the beach. We had some fun time creating those cones too - super fun to see Shibin trying to create cones and ending up with huge ones that would hold almost  a 1 kg of the kernels:P Some childish crafting at work:) Blogging is fun!

kitchenspells.blogspot.com


Here is the recipe -

Ingredients

  1. Sweet Corn kernels - 1 cup
  2. All Purpose Flour - 3 tbsp
  3. Corn Flour - 3 tbsp
  4. Chilli powder - 1 tsp
  5. Onion - 1 finely sliced
  6. Coriander leaves - 2 tbsp finely chopped
  7. Water - 2 tbsp
  8. Salt to taste
  9. Oil
Method
  • Mix together all purpose flour, corn flour, chilli powder and salt.
  • In a bowl, use your hands to mix together the dry ingredients with the sweet corn kernels.
  • Sprinkle 2 tbsp water on this and give a firm mix so that the batter holds on to the kernels.
  • Heat oil in a deep pan and test by dropping one kernel into it. It has to crackle and rise to the top.
  • Keep the flame on medium throughout and once the oil is ready, drop a handful of kernel into it. Let it fry and rise to the top.
  • Drain excess oil on tissue paper.
  • Transfer to a bowl, add chopped onions and coriander leaves. Sprinkle a little chilli powder and give it a good toss.
  • An easy snack for those lazy evenings.

You may also note - 
  • Fry as soon as you make the mix, do not let it rest for too long as it tends to get a little soggy and will end up holding kernels as a bunch and not as individual ones.

Thursday, 16 March 2017

Herbed Focaccia with caramelised shallots

kitchenspells.blogspot.com


I am relatively a beginner in bread baking and this is probably the only bread I have baked more than the fingers on my hand! I tasted focaccia only when I came to Dubai and that was the first time I even heard of it. Back in India, I knew 4 types of bread - white bread, brown bread, multigrain bread and fruit bread - that was my extent of bread knowledge.  I would not label bread baking as difficult - it is only time consuming - so if you have the time in hand - Foccacia is definitely worth a try.

Focaccia is an Italian bread with a generous amount of olive oil - topped with herbs, olives, onions, sun-dried tomatoes or any other vegetables that goes along. Focaccia, I realised recntly makes a good sandwich bread too! I have tried topping with olives , tomato and onions but the best for me was the shallots. It is easier to chop them into cute little rounds - it caramelizes well and the looks quite pretty on the bread too. I read an article today by Nandita Iyer from the Saffron Trail in the Hindu where she outlines the need to eat with your senses and we did just that with focaccia!

kitchenspells.blogspot.com


Ingredients

  1. All Purpose Flour - 1½ cup + extra for dusting
  2. Water - ½ cup warm
  3. Instant yeast - 11 gm sachet
  4. Olive oil - ½ cup (¼ +¼ divided)
  5. Shallots - ¼ cup
  6. Sugar - 3 tbsp
  7. Garlic and Herb seasoning - 1½ tsp
  8. Semolina - 2 tsp
Method
  • Dissolve the yeast and sugar in warm water. Let it rest for 5 minutes.
  • Sieve together the flour and salt into a bowl. Make a well at the center of the bowl and slowly add the warm water mixing it together using a fork.
  • Now add olive oil - ¼ cup in small batches till the dough holds itself together. The dough is going to be sticky at this point.
  • Dust your work surface with a little flour and tip the dough over. Knead for roughly 5 to 10 minutes. The dough should not be very hard to knead, it should be smooth and easy to stretch.
  • Grease a bowl with a little olive oil - cover with a cling film and let it rest for 45 minutes to 1 hour in a warm place to double itself.
  • Meanwhile, chop the shallots into rounds and add a tsp of olive oil to this and give it a good mix.
  • Take a baking tray and sprinkle semolina at the base of the tray. 
  • The dough in one hour would double itself and would have a very smooth texture. Punch it down and tip it over into the tray and firmly press down with your hand to attain the shape of the tray uniformly. Poke into the dough using your finger tips to create random patterns as you can see on the bread .( Trust me it is superb fun to do that!!)
  • Sprinkle the seasoning and spread the shallots over the surface. Give it a light press so that it holds itself to the dough but doesn't insert itself.
  • Sprinkle a little bit of salt all over and be generous with you olive oil on the surface.
  • Cover it with a cling film and let it stand for 45 minutes.
  • Pre-heat your oven to 220 degree centigrade  and place in the tray. Bake for 30 minutes till the top of the bread begins to brown.
  • Remove it from the oven and let it cool for 5 minutes before you dig in you knife:)
  • Focaccia is a breakfast or snack in itself that goes well along with your coffee or tea. The herbs and the olive oil gets infused into the bread and the caramelized shallots give the focaccia a lovely aroma.
  • You could also try this with a chilli chutney which I thought was a lovely combo!
kitchenspells.blogspot.com

You may also note -
  • It is necessary to knead the dough well and leave it for proofing. Ensure that the dough has risen - approximately an hour should do but colder areas may require more time.
  • Usual recipes call for 20 minutes bake time - I got mine done in 30 minutes so keep checking yours to ensure the lovely brown color on top.
  • Avoid opening the oven too many times to check - check at the 20 minute mark first.

Saturday, 20 February 2016

Mangalore Buns/ Banana Poori

kitchenspells.blogspot.com

A small tea shop in front of our college campus was the favorite hangout place during our free hours in college at Brahmavar. This is where we have feasted on the Mangalore Buns as it is popularly called. Do not go by the name Buns! It is nowhere similar to the normal buns baked out of the oven. It is deep fried in oil and usually served as tea time snack along with chutney. It is sweet, hence can be eaten without a chutney also. That is precisely what I did roaming around with a piece in my hand and preparing for our trip to Al Ain Zoo. That is a long awaited trip and we finally did it this weekend Yay!

Guess what we were lucky too! Got to see the majestic White Tiger and White Lion in all its glory and majesty. I had packed a few buns for our evening snack time which we gorged on after the visit to the Zoo. I hope you guys too try out this recipe, you could make it a tiffin box recipe for your kid too:) A simple way to use the overripe bananas which you do not feel like eating! 

So here is my version of the recipe. Though generally made with Maida/ All Purpose Flour, I chose the healthier Wheat Flour.  Hence ate it guiltless:)

kitchenspells.blogspot.com


Ingredients
  1. Wheat Flour - 2 cups + 3 tbsp for rolling the dough
  2. Banana - 5 ( I used elaichi bananas)
  3. Sugar - 5 tbsps
  4. Jeera - 1/2 tsp
  5. Yogurt/Curd - 3 tbsp
  6. Baking soda - 1/2 tsp
  7. Ghee - 2 tbsp
  8. Salt - 1 pinch
  9. Water as required
Method

Mash the bananas along with the sugar in a bowl. Riper the bananas, the easier to mash. You could user a blender or a spoon would also suffice. To this add the wheat flour, salt, baking soda, jeera(lightly crushed) and mix it well using a fork. Add the yogurt and roll it into a dough. Generously rub ghee on both your hands and fold in the dough once again. Keep it covered for atleast two hours or refrigerate it overnight. In case you refrigerate, make sure that you keep it out for atleast two hours before you make it.

Make balls out of the dough. Roll it out using a rolling pin using the flour when required so that it doesn't stick. Avoid overusing the flour as it leads formation of residue in the oil.

In a skillet heat the oil. Once the oil is hot, slowly slip in the rolled out sheet one at a time.  Using a spoon, keep splashing oil onto the top as it raises. Ensure that the flame is on medium. Flip over to the other side once it is uniformly brown in colour. Once both the sides are done. Transfer this to a tissue paper so that the excess oil seeps onto it.  

Buns do not absorb much oil and hence you can be judicious while pouring the oil into the skillet.

Serve it hot with chutney of your choice.

kitchenspells.blogspot.com


Sunday, 14 June 2015

Beetroot Cutlet - Snack Time

Beetroot Cutlet makes me quite nostalgic.

My earliest memory of this dish is when I made it in Class 9 for a proficiency badge in Guides movement. For those of you who are not familiar with the Scouts and Guides association, it is a movement to develop the young boys and girls as responsible citizens which may not be achieved through civic education alone. You need to cross various stages and tests to be eligible for the Rashtrapati Award. Each of the stages consists of a set of badges that need to be achieved and one among that was a proficiency in cooking for which we were to take to school a dish prepared by us. It was my mother’s suggestion that I try this recipe which she had noted down in her diary sometime back. The examiner being a vegetarian and a foodie loved it and I landed the proficiency badge.

The second story dates to my PG days in Bangalore. My room mates had gone home for the weekend and I was left alone in the PG with nothing better to do. I thought of trying this recipe, not quite sure of the quantity this would make. In the end, I ended up making exactly 63 cutlets which fed four of us for over a week.

The last time I made this in Bangalore was along with a colleague for Potluck in office where each of us had to get a dish from home. We did have a target of 40 cutlets, well overshot it and made 50  and the mix left over for another 20 – 25. Too tired to make any more we just refrigerated the mix and had it a day later along with chapatti just like that!!(Not bad I must say)

Last of all not to forget a dear friend, who hates beetroot, yet we succeeded in getting him to have this for potluck. Every time I see or hear “ BEETROOT”, I remember him :)

Here goes a quick snack which surprisingly to me goes well with finely chopped onions and coriander leaf garnish. It is the onset of monsoon in India, so why not try this over a weekend while I sit and eat the cutlets here in UAE dreaming of the monsoons.

kitchenspells.blogspot.com

Ingredients

Beetroot - 3 grated
Potato - 2 Boiled and mashed coarsely
Green Chilly - 2 finely chopped
Ginger - 2 tsp finely chopped
Cumin seeds - 1 tsp
Onion - 1 finely chopped
Coriander powder - 1 tsp
Chilly powder - 2 tsp
Maida/ self rising flour - 3 tbsp
Corn Flour - 3 tbsp
Bread Crumbs
Oil
Salt

Method

Heat the 2 tbsp oil in a skillet and toss in the cumin seeds. Saute for a minute and add chopped ginger.Keep sauteing and add the onions. Cook till translucent and add chopped green chilly.

Add the coriander powder and chilly powder. Saute till the masala is cooked and add the required salt. Toss in the grated beetroot and mix it well. Saute for about 4 - 5 minutes till the water that has oozed from the beetroot dries up. 

Switch off the blame and fold in the mashed potato with a fork. While still warm, roll it up into shapes you desire. Stack it up in an air tight container and freeze it for about an hour. The patties would now be a little firm.

Mix maida and Corn Flour along with water to create a paste in which the patties can be dipped and then roll it in bread crumbs.  Non - vegetarians can use beaten egg for the dip instead of maida and corn flour.

Shallow fry the cutlets in oil for around 4 minutes on either of the sides on medium flame. Serve it hot with finely chopped onion and coriander garnish and with tomato sauce dip.


You may also note - 
  1. You can freeze the remaining patties for later use. However, ensure that you remove it from the freezer at least half an hour before you fry.
  2. Do not mash the potatoes finely. Leave a few chunks, adds more taste to the cutlets.
  3. In case you mixture is not holding itself together and you are unable to roll it - add bread crumbs into the mixture and this will hold better.
  4. Use only the required amount of oil. Excess oil may result in your mixture being oily and it will not hold together.
  5. You can also deep fry it. I tend to shallow fry to reduce oil consumption.

kitchenspells.blogspot.com


Monday, 4 May 2015

Swiss Roll/Jam Roll

Swiss Roll/Jam roll

Jam roll always reminds me of the summer vacations while we were still at school -a long two month hiatus in Kerala along with my cousins. There was a routine established for the four of us and the most important of it all being the 5 pm wait on our balcony for my aunt to get back from work - for pouncing on the goodies in her bag. She never failed us. 

Jam Roll was my favorite, it always intrigued me. Sometimes I would just bite into it hungrily and sometimes I took the time to unroll it lick away the delicious mixed fruit jam and then dig on the cake. The 'little me' never would have imagined that she would actually be making jam roll one day.

The idea of trying out something like this popped up when we brought orange marmalade. I was tasting it for the very first time and it did not fascinate me much. I had a bottle full of it and did not absolutely want it to rot away. That is when my hubby told me why not try a Swiss roll? I was clueless how this was done. Yet, I decided to try out on a weekend as we were expecting a few guests. I baked the cake for the roll but it was adamant and refused to roll, cracking up when I tried to roll it.  I could not let it go waste. So I decided to sandwich the marmalade between two slices of cake cut into circles and dust it with powdered sugar. It tasted good but the cake had turned out a little harder making the rolling difficult. I decided to research on this a bit more and this time it turned out the way just I had wanted it to.
Swiss Roll/Jam Roll


Honestly, making a jam roll is not complicated as it looks. Just a little bit of patience and there you are.


Ingredients

For the sponge cake-

Self raising flour/Maida - 1 cup
Powdered sugar - 1 cup (3/4 goes into the cake and the rest for dusting)
Eggs - 4 separated
Vegetable oil or butter - 2 tbsp
Vanilla essence - 1 tsp
Baking powder - 1/2 tsp

Marmalade/ Jam/ Cream - flavor of your choice


Preparation
  1. Sift the flour and baking sugar and keep aside.
  2. Separate the egg yolk and white. Whisk the egg white along with a little sugar using a hand blender or electric blender for 7-8 minutes so that it becomes thick.
  3. Add the vanilla essence into the egg yolk and mix it well. 
  4. Into this, add 3/4 cup of the powdered sugar and the egg white. Fold in gently using a spoon or spatula in order to avoid air bubbles.
  5.  Add the sifter flour, fold in the mixture well and finish off with the vegetable oil.
  6. The cake mix is now ready to go into your oven.
  7. Make sure that you pre - heat your oven at 180 degree for 15 minutes. Grease a square baking tray, in case you do not have that, you can use your roasting tray as well. Pour the mix into this and make sure it is evenly spread across.
  8. Place in the oven for 10 - 15 minutes. Keep checking to avoid overcooking or browning of the cake.  
  9. Sponge cake rolled in parchment paper
    Roll the sponge cake while hot along with the parchment paper
    Remove it from the oven once done and invert on top of a parchment paper which has been sprinkled with powdered sugar.( In case, the cake is too thick and you want your rolls to be thinner, you may just slice through the center)             Sprinkling of sugar is important else your cake may stick to the paper.
  10. While still hot, roll the cake along with the parchment paper till the fag end. Tie up the ends to retain the shape and leave it to cool.

11. Once it has cooled down, unroll it spread the jam or marmalade evenly over the entire length and a little thinner towards the sides as the excess may pop out as we roll. Dust the roll with powdered sugar.Roll it back and cut out the rolls into thickness of your choice

Jam Roll
Cut off the ends of the roll where the excess jam has spilled over
Your Jam Roll is ready to be served. Once a while instead of just making a sponge cake, you can layer it with jam and roll it - impressing everyone around you.
Jam Roll


Wednesday, 22 April 2015

Carrot Cake

It all started for Christmas in 2012 when a colleague gave me a cake recipe. The very same day I purchased all the ingredients and made my very first cake. I did not have an oven and resorted to baking the cake in a cooker. ( you need to be careful, you don't use water and gasket and the cooker gets mighty hot). Since then, I have tried a lot of cakes in the cooker. It did turn out tasty but often a little too hard with the bottom and the edges burnt,

I have also tried the traditional method of baking where the cake tray is inserted into a vessel with hot sand generally kept over the traditional chullah. The vessel is then covered with a lid with burning coal on top as well so that the cake gets evenly baked. I was too scared to handle that and it was my mother who was a master in that and me just a by stander.

It was only post marriage in 2014 that I learnt to use an oven to bake cakes. I had no idea about the right temperature nor the timings .After a few burnt and also sometimes under cooked cakes, I do have an approximate idea now.

Initially cake baking was a tedious and tasking job for me - sometimes the cake does not rise, I have too many bubbles in the cake, I have the nuts and fruits settling at the bottom and the top of the cake is not cooked enough where as the bottom is burnt. My husband is a wonderful 'analyser' and I would say 'get it right person'. He often googled up and found solutions to most of my problems.

I have not yet mastered the art of baking and I hope to some day. As of now, I am still learning and correcting as I go along.

Your cakes can turn out right if you learn to love your ingredients and handle them as instructed in the recipes you find across in different sites. For instance - make sure all your ingredients are at room temperature and stick to the measurements provided. Once you have a knack of it, you may try variations.

So let me move on to my carrot cake.

A wonderful evening with Tea, Cake and a Perfect book.


Carrot Cake


Ingredients

All purpose flour/Maida - 2 cups
Powdered sugar - 1 cup ( you may raise it to 1 and a half cup - neither of us have sweet tooth so I generally add lesser sugar)
Egg - 2( if the egg is really small you may add 3)
Buttermilk - 1/2 cup
Oil - 1/4 cup
Cinnamon powder - 2 tsp
Baking powder - 1 tsp
Vanilla extract - 1 tsp
Carrot - 2 grated
Raisins
Cashew nuts
Salt

Preparation


    Carrot Cake
  1. Mix together the dry ingredients in a bowl - flour, powdered sugar, baking powder, salt and cinnamon powder. Sieve it in order to prevent formation of lumps.
  2. Beat the eggs well along with vanilla essence and add in the buttermilk and oil. Combine it well.
  3. Slowly add the dry ingredients to the wet ingredients mixing it well as you add. Do not beat it further, just enough for the ingredients to mix else it may lead to formation of air bubbles.
  4. Add the grated carrot into the cake mix and fold in gently.
  5. Roll in the cashews and raisins in a little flour  and keep aside.
  6. Preheat your oven at 180 degrees for about 10-15 minutes. 
  7. Grease your cake tray with a little oil and dust flour on top of it. Turn the tray upside down and pat away the excess flour.
  8.  Pour your cake mix into the pan and add the nuts and raisins evenly . Just run your spoon across once and cover the cake tray with an aluminium foil. Gently fold in the sides of the foil- no free ends should be sticking out touching the corners of your oven. Covering your cake with foil allows the top of the cake to be uniformly heated and baked.
  9. Place your tray in the oven at temperature of 180 degree. Check your cake after 20 minutes. Insert a tooth pick or pin and if it comes out clean your cake is ready. Else keep it for 10-15 more minutes. The cooking time may vary depending on the tray you use and the consistency of your mixture. The ideal time would be somewhere between 20 to 35 minutes. My carrot cake took about 25 minutes.
  10. Once baked , remove the cake from the cake and let it cool before your slice and have your first bite.
Enjoy every bite of your cake with steaming tea!!